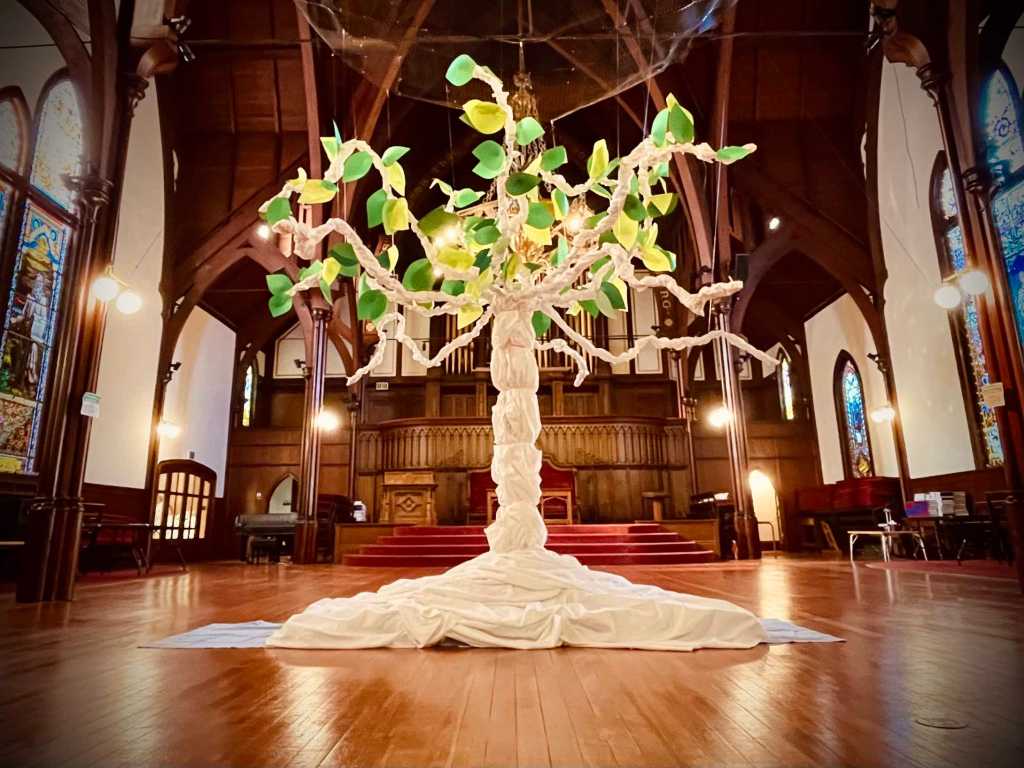
While still sheltering in place, we continue to open our sanctuary for neighbors and the congregation to come by for a moment of quiet reflection. This season of Epiphany, I built an Epiphany Tree for people to hang their prayers and hopes. As the prayers are added, the tree will blossom and evolve over the coming weeks.
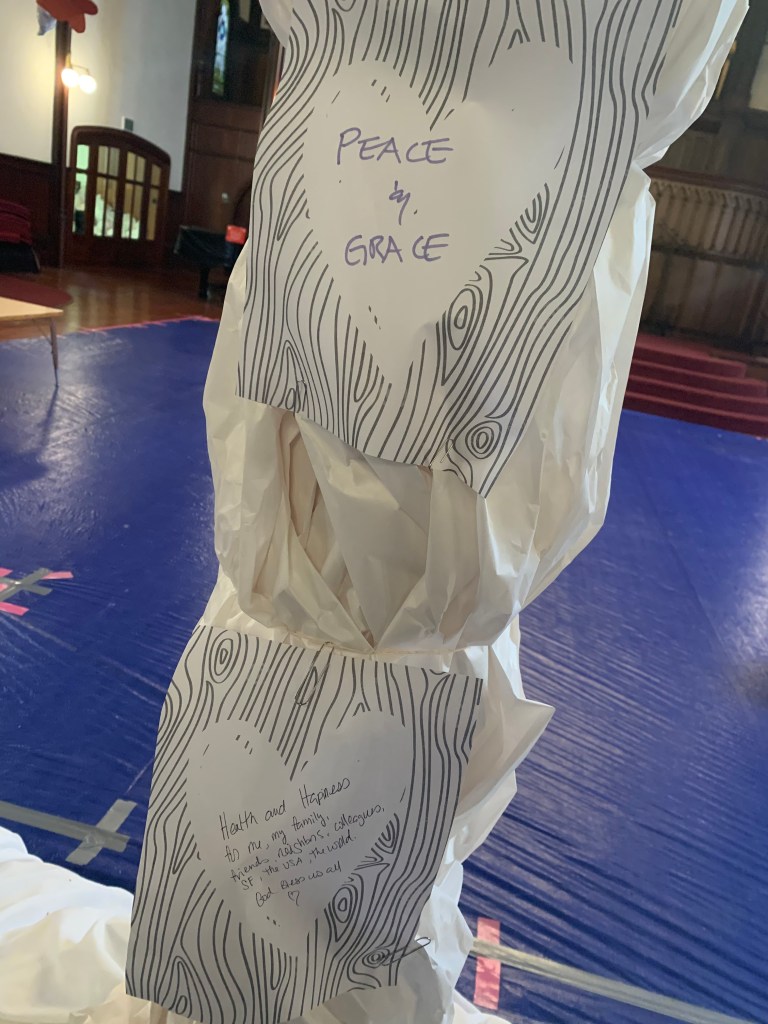
The first week, people were invited to add leaves, then flowers and butterflies, and finally “carved hearts” on the trunk.
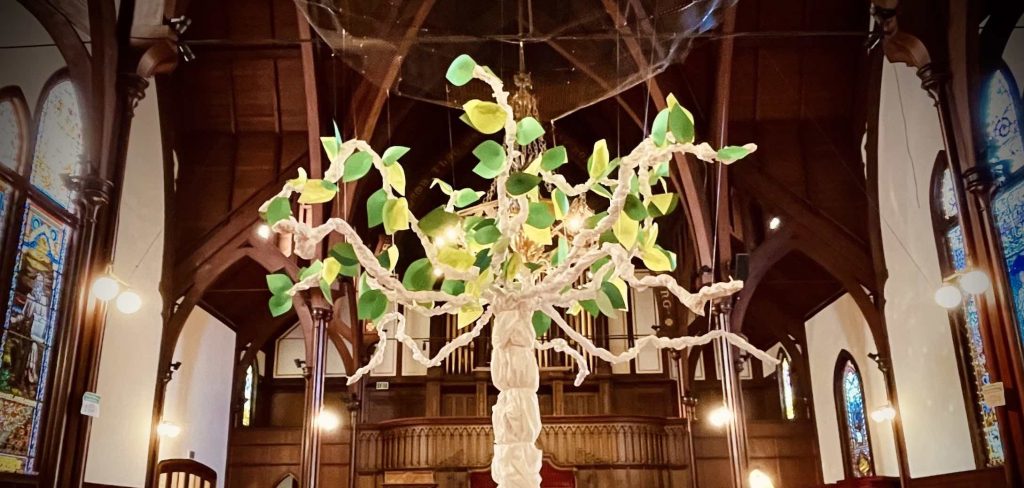
Leaves are added to the tree the first week. 
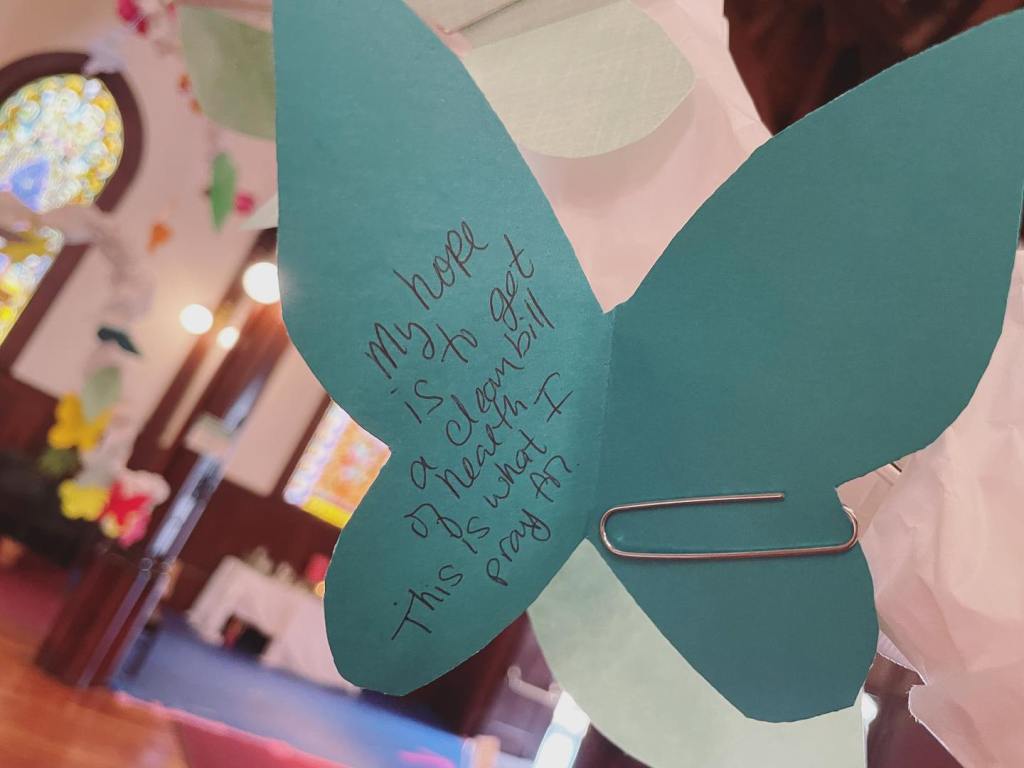
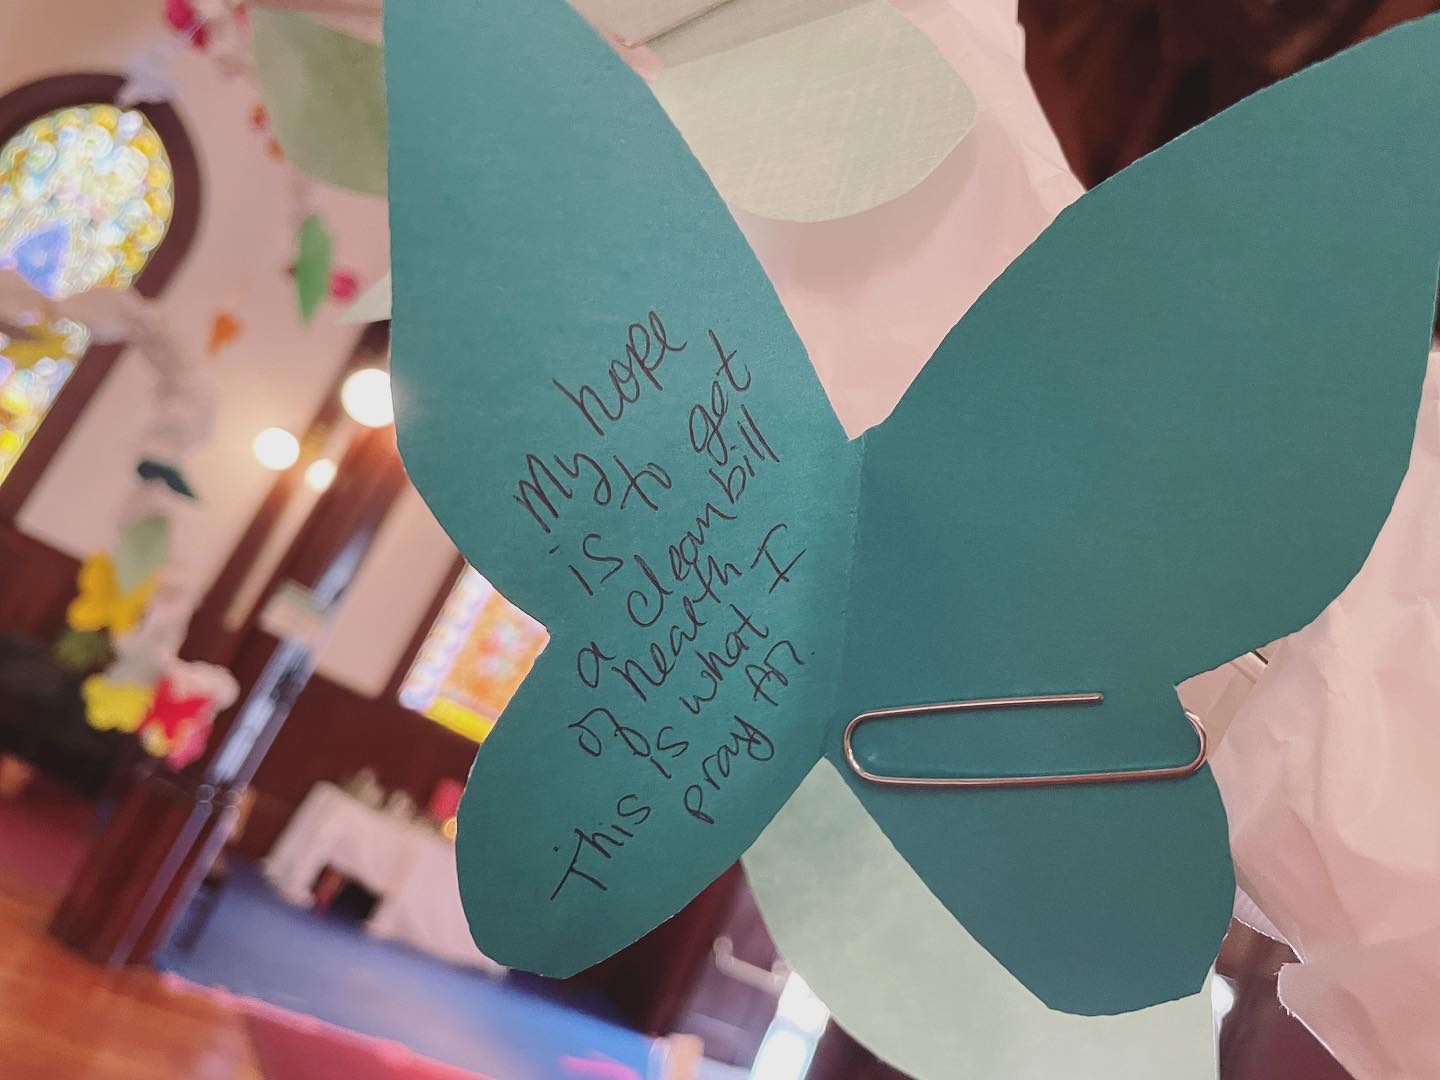
Prayers and hopes are written on leaves to add to the tree. 


People can also write words on seed paper to take with them and plant. 

People are invited to light candles in honor of someone. 
The second week, flowers are added. 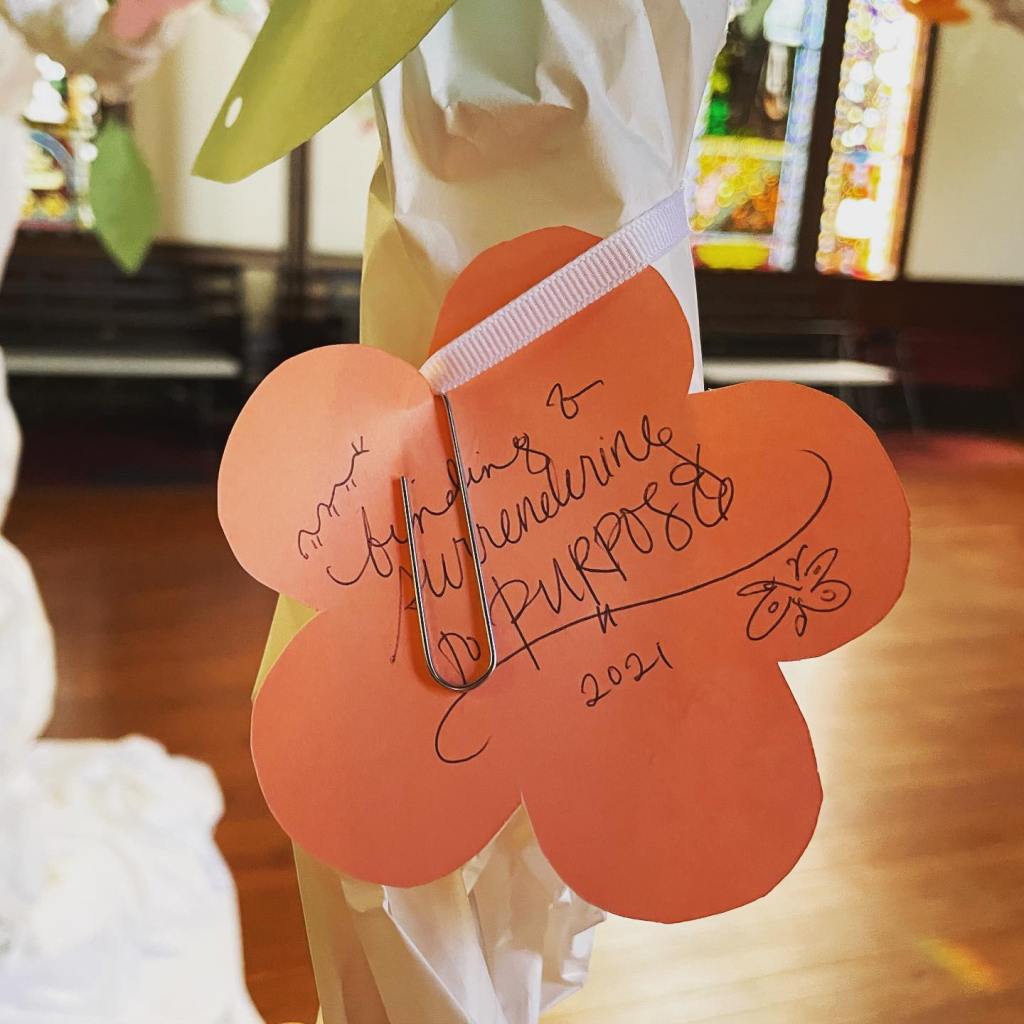

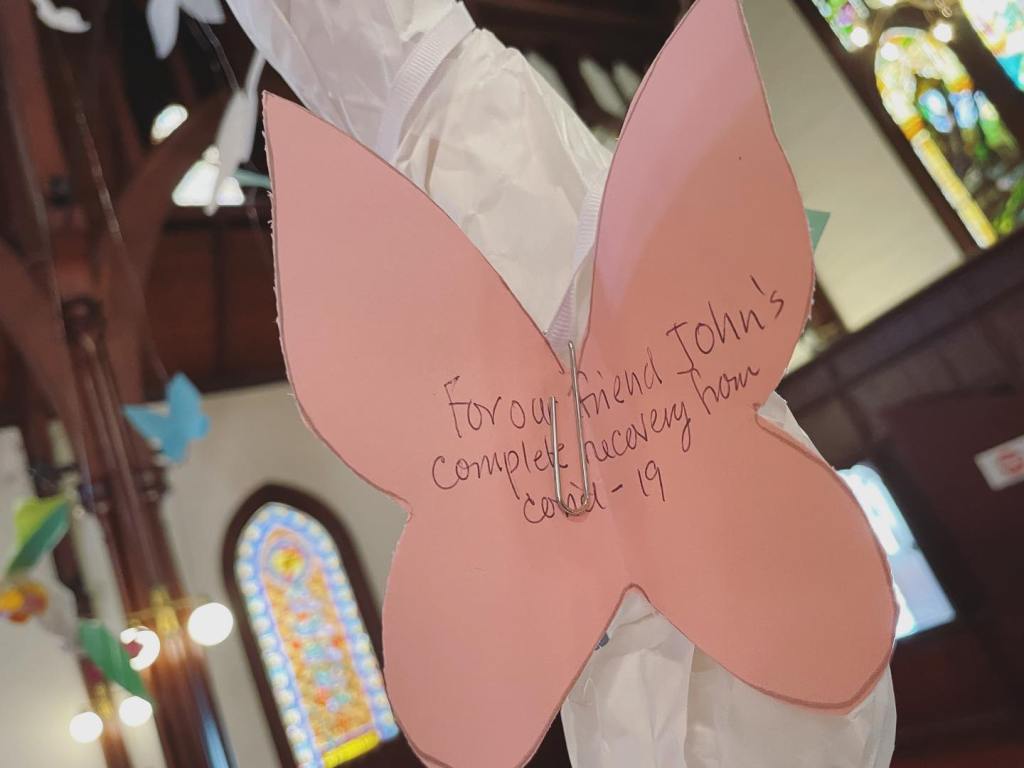
Butterflies are added to the tree on the third week. 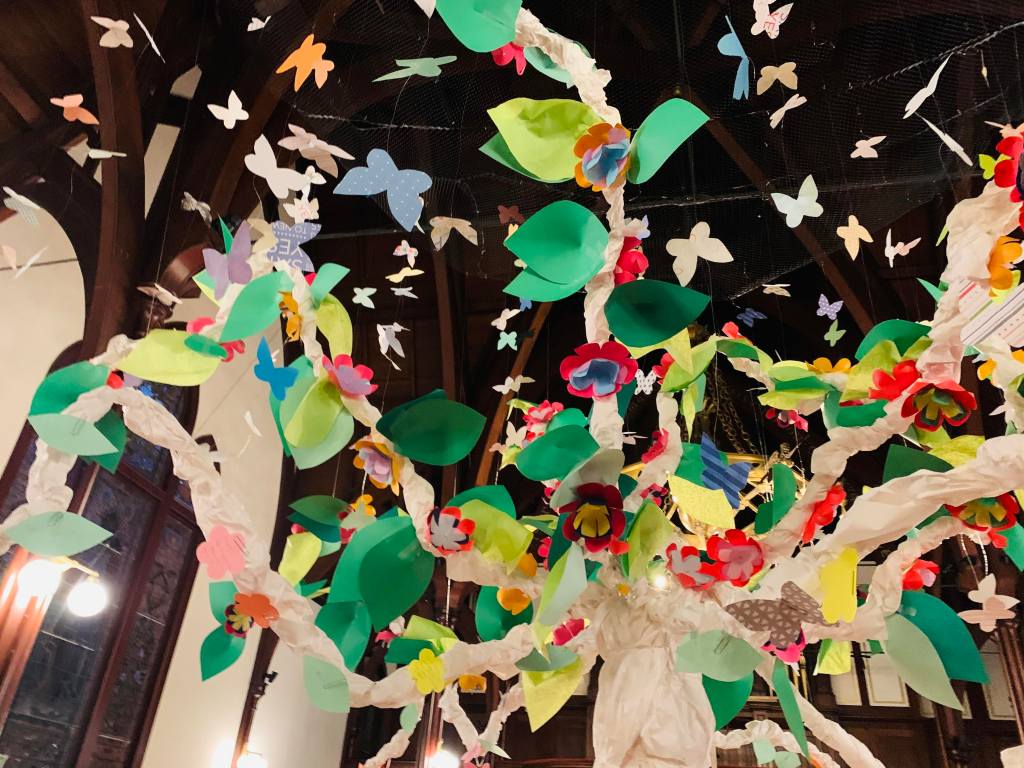

So, here is how I built the tree. First, my guidelines for doing anything interactive is: 1) reuse, repurpose, recycle materials used; 2) create opportunities for people to add and interact; 3) easy to tear down, work around, or move since the sanctuary is also being used as a food pantry.
building the tree
I was inspired by this YouTube tutorial on building a paper bag tree.
However, I wanted to make my tree much bigger about 12-15 ft tall. So I improvised and tweaked some of the basic elements of this tree.
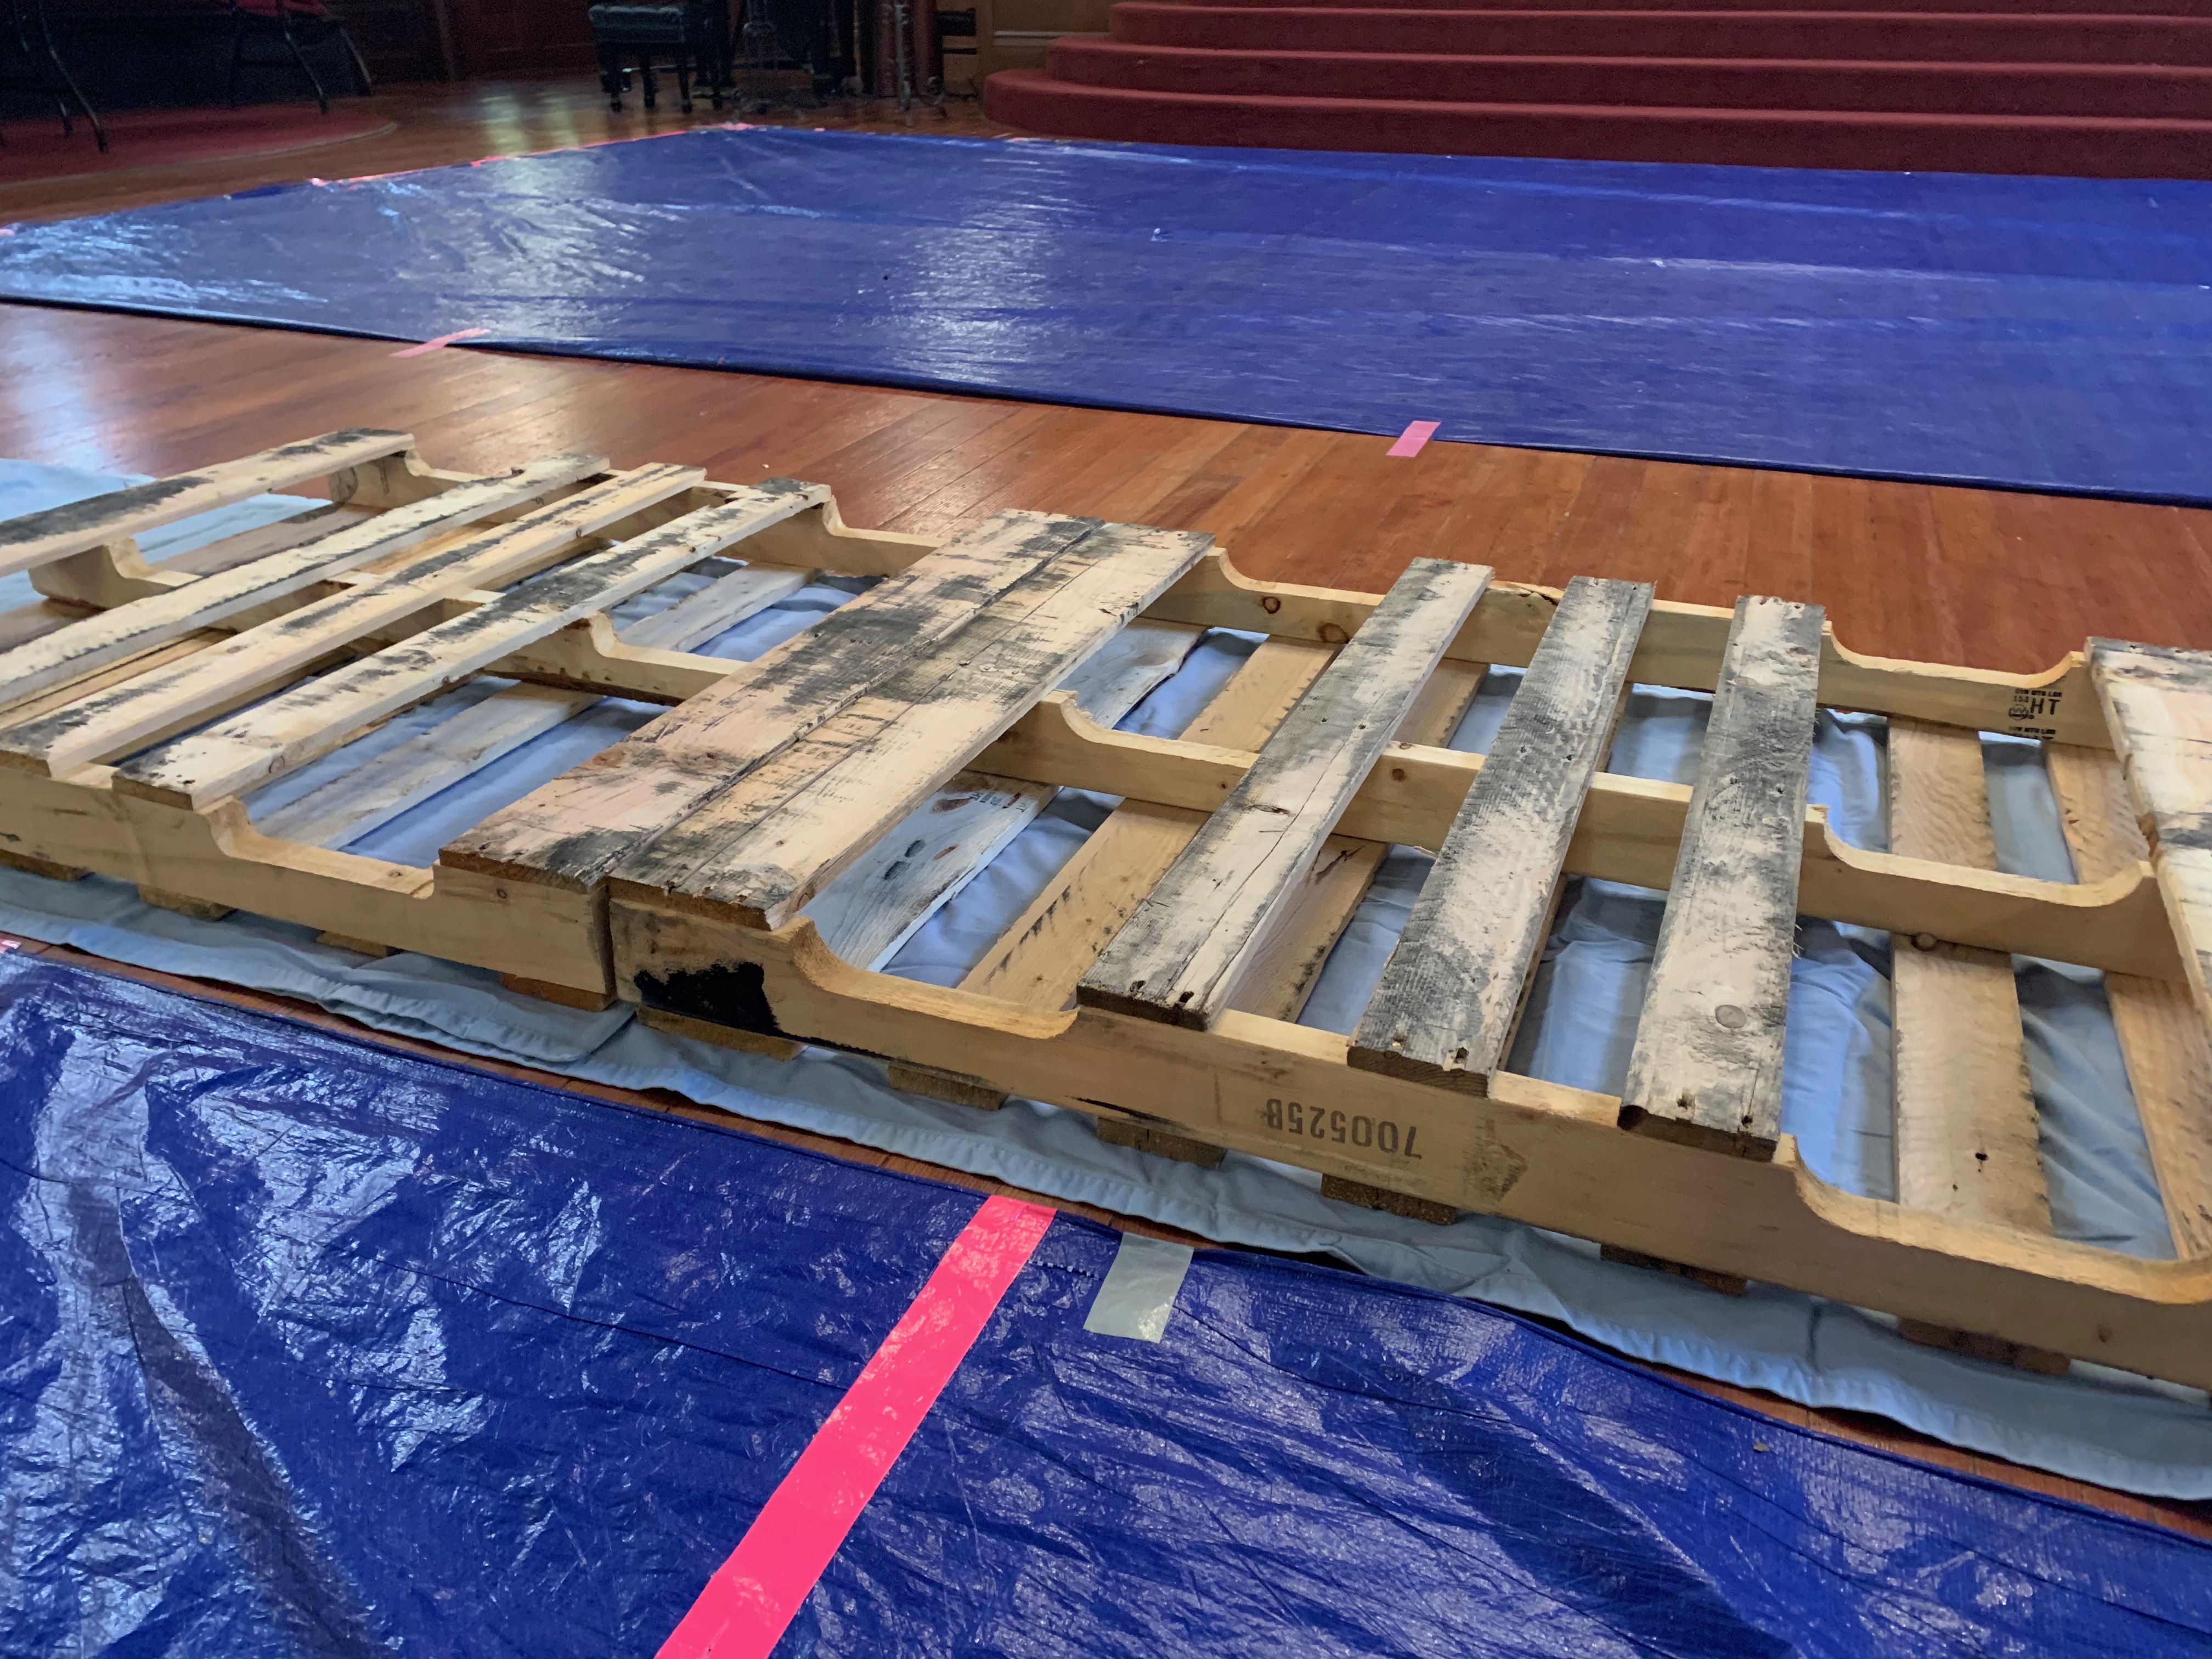
Instead of building a wooden platform, I used two pallets from our food pantry.
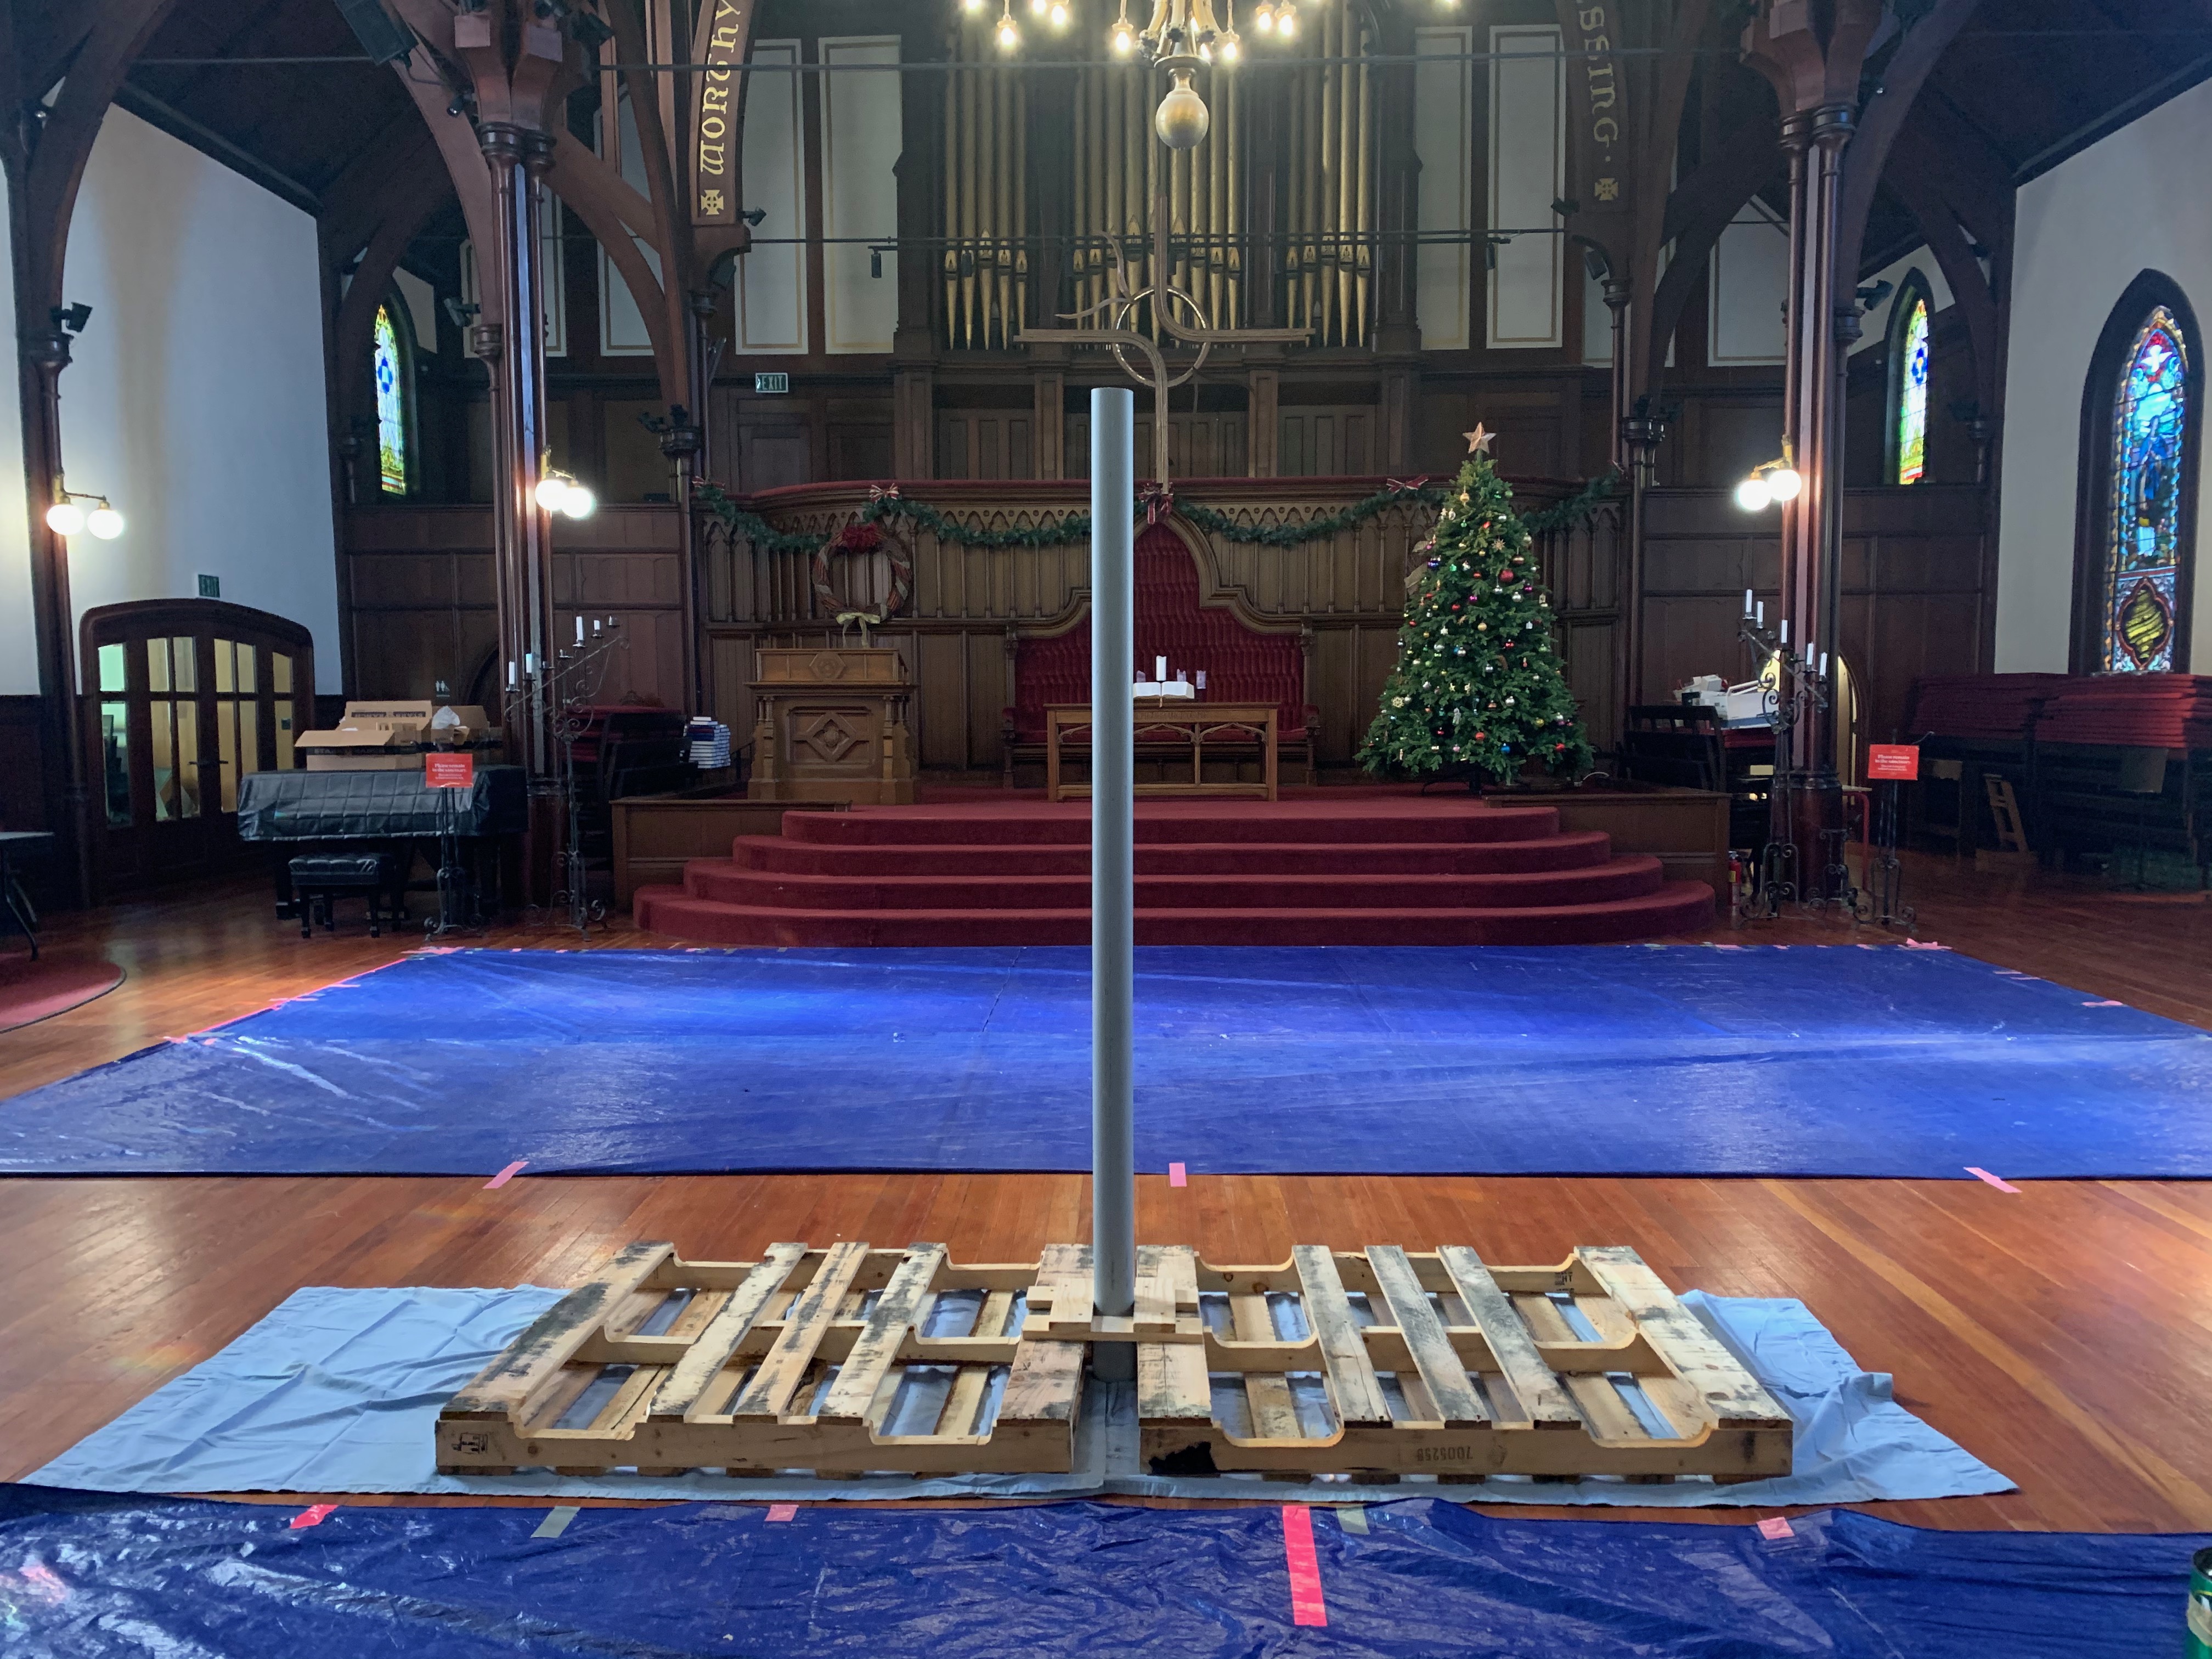
Instead of purchasing a PVC pipe, I found a plastic pipe in our church’s storage basement that had a wider mouth (5 inches wide). I used a hand saw to cut it down to 7 feet and secured it to the pallets in a similar way described in the video.
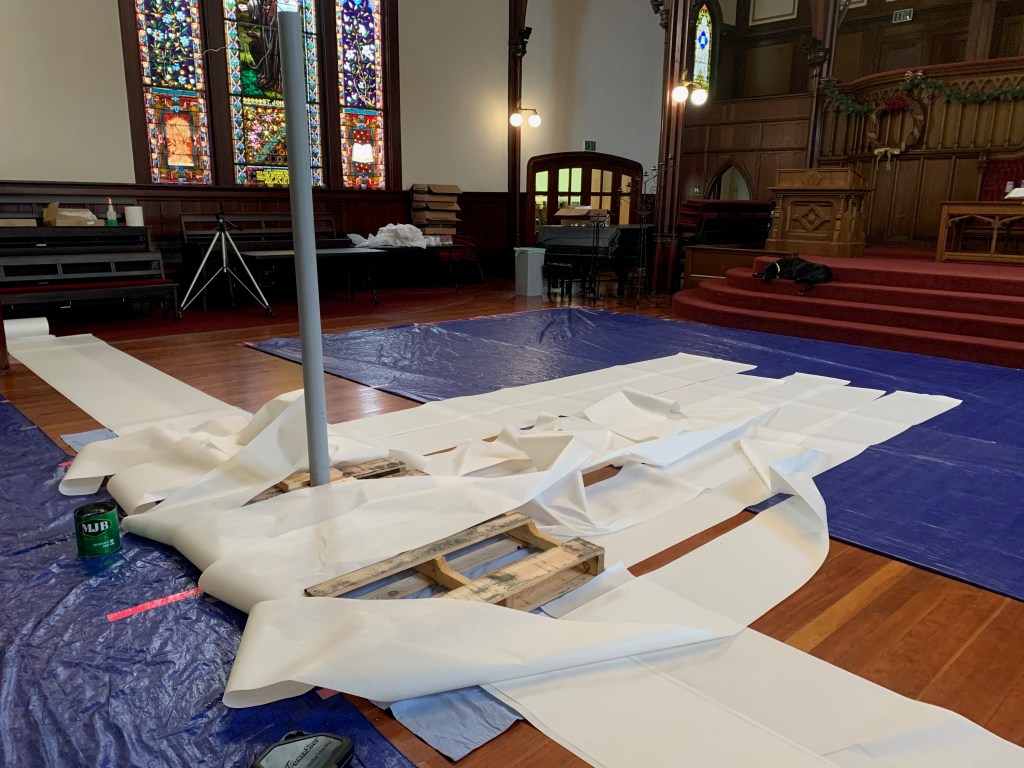


Similar to the video, I wrapped the tree in paper. Instead of using brown paper, I purchased a huge roll of butcher paper from SCRAP (a junk art store) for $3. Using a staple gun, I stapled one end of the paper to the base of the pallets. One by one, I began to twist them up and around the pole. I used twine to tighten and secure the paper to the pole until I got the look I wanted. At this point, it looks more like a sad palm tree than a vibrant tree.
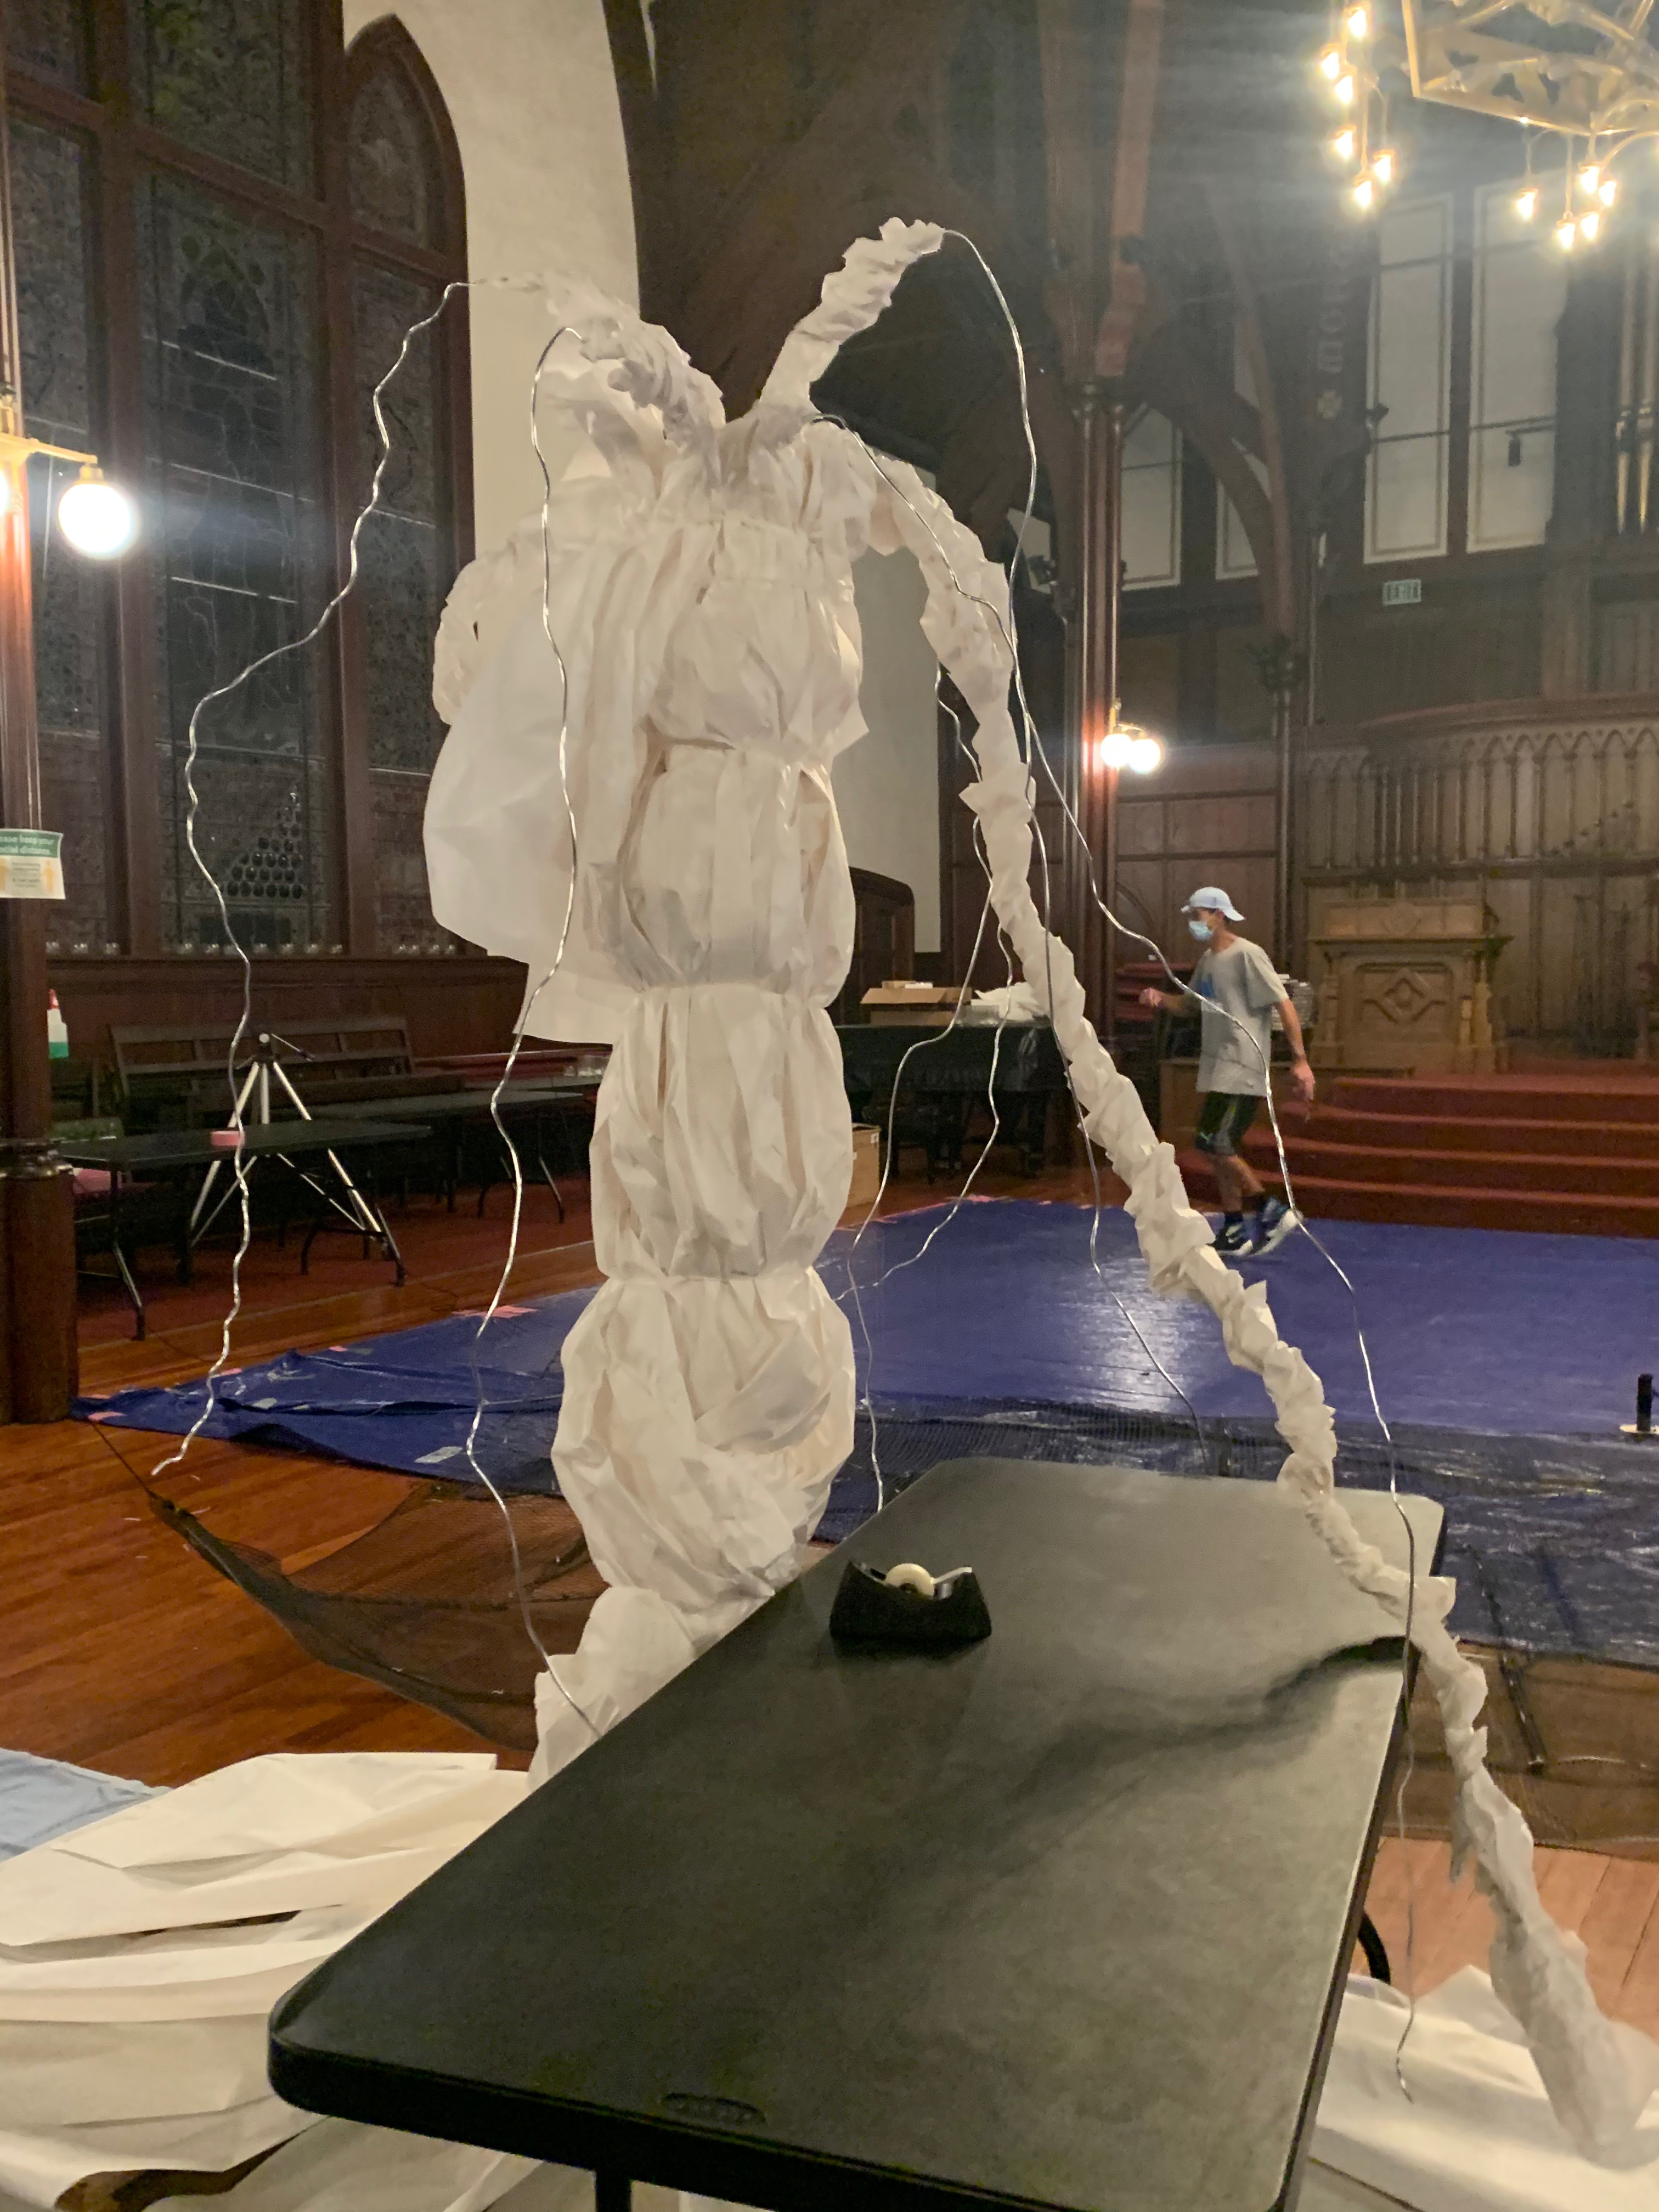
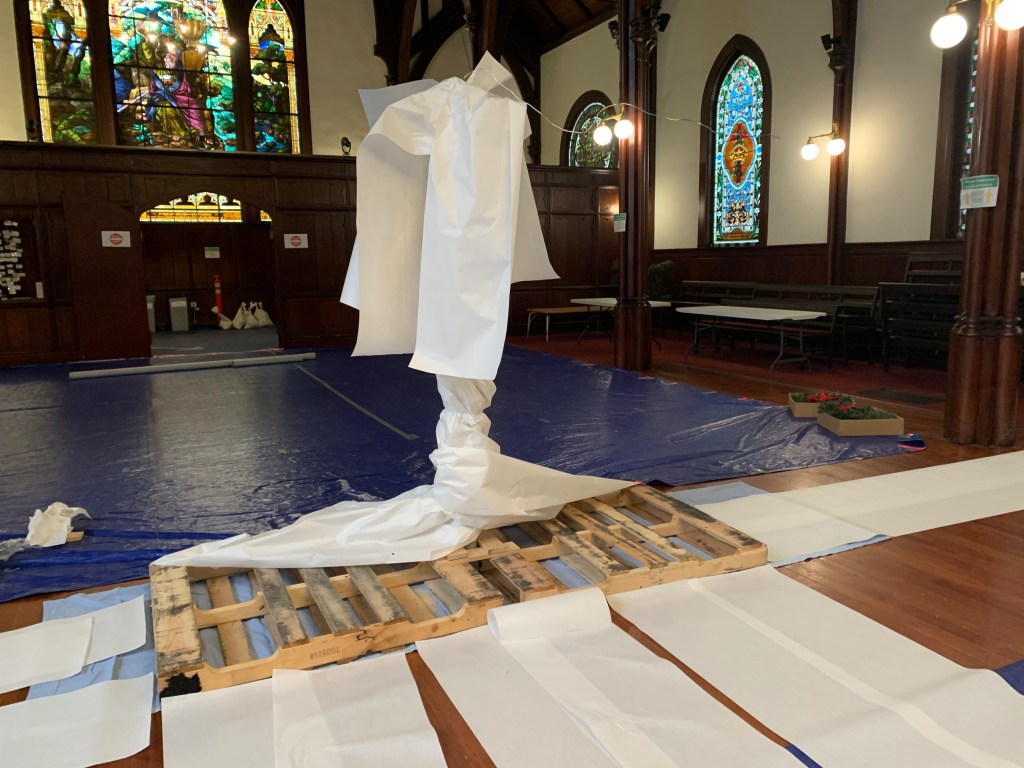
I used a thicker gauge wire than what was used in the video. I used 10 gauge craft wire. I needed the wire to be flexible, but sturdy enough to hold paper. I began by cutting the wire at different lengths and stuffing one end into the opening of the pipe. I, then, began to wrap the paper around each wire until all of it was covered.
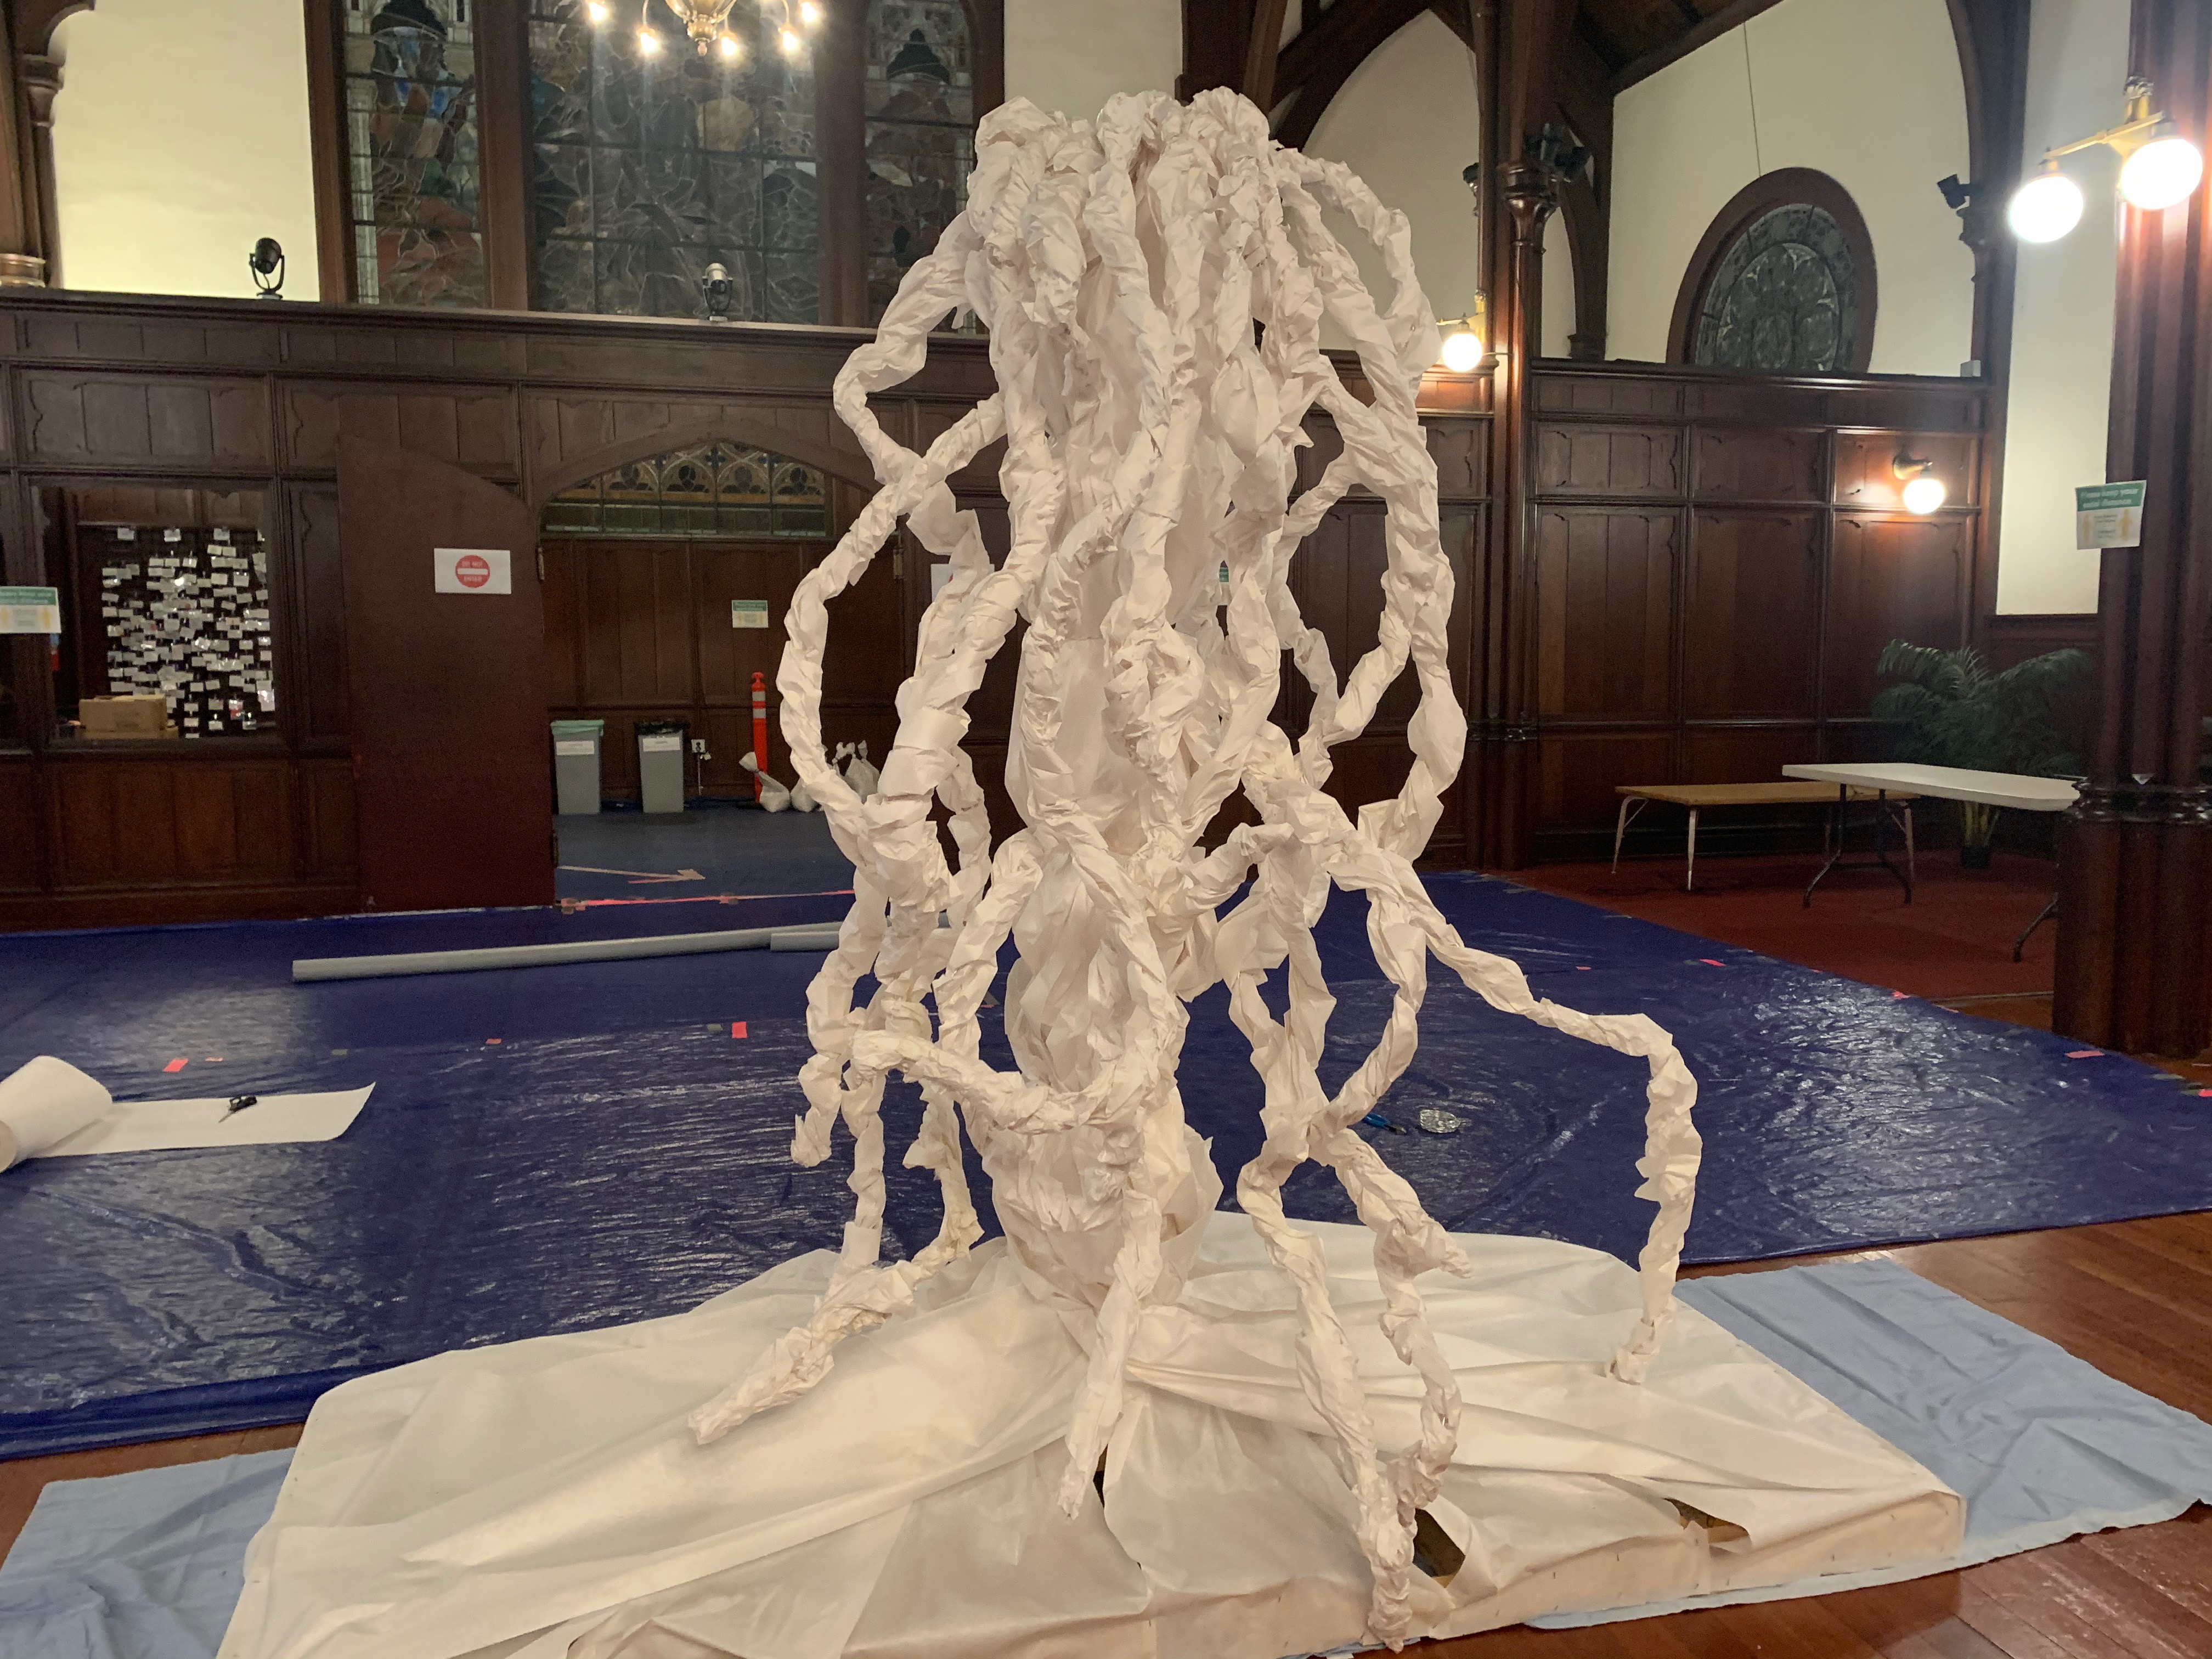
At this point, you should have a nice looking squid-like structure. I will admit that at this point, I started doubting the process. The next challenge was to figure out how to get the branches up. Because of the size, the branches did not hold on their own like it did in the video.

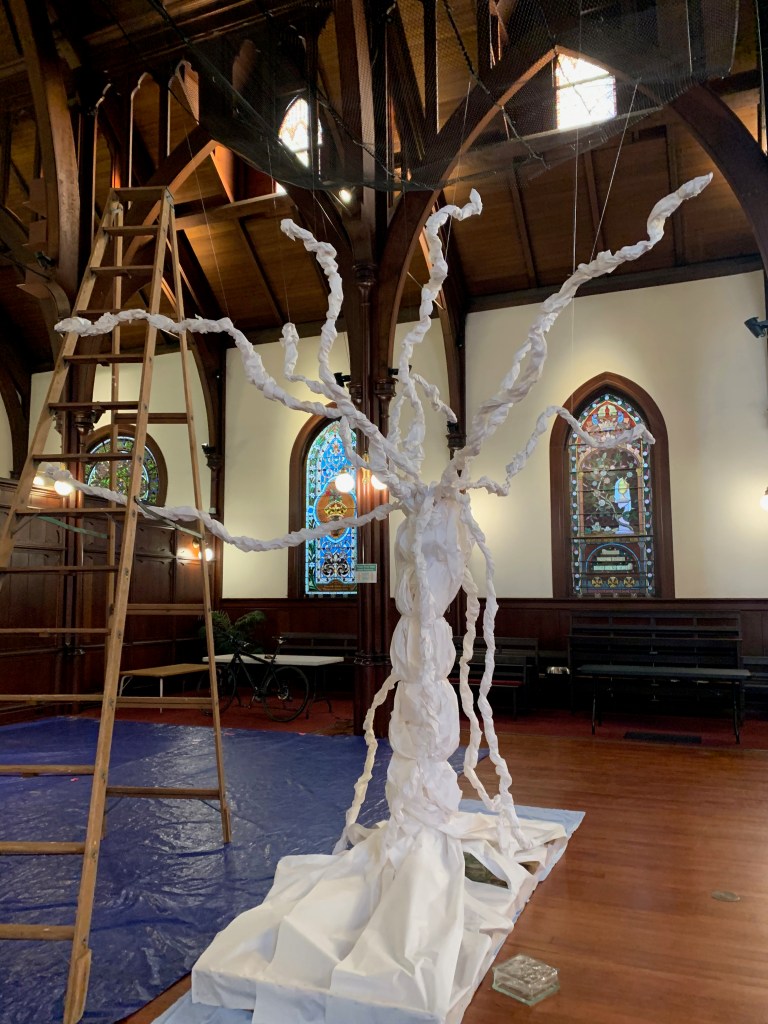
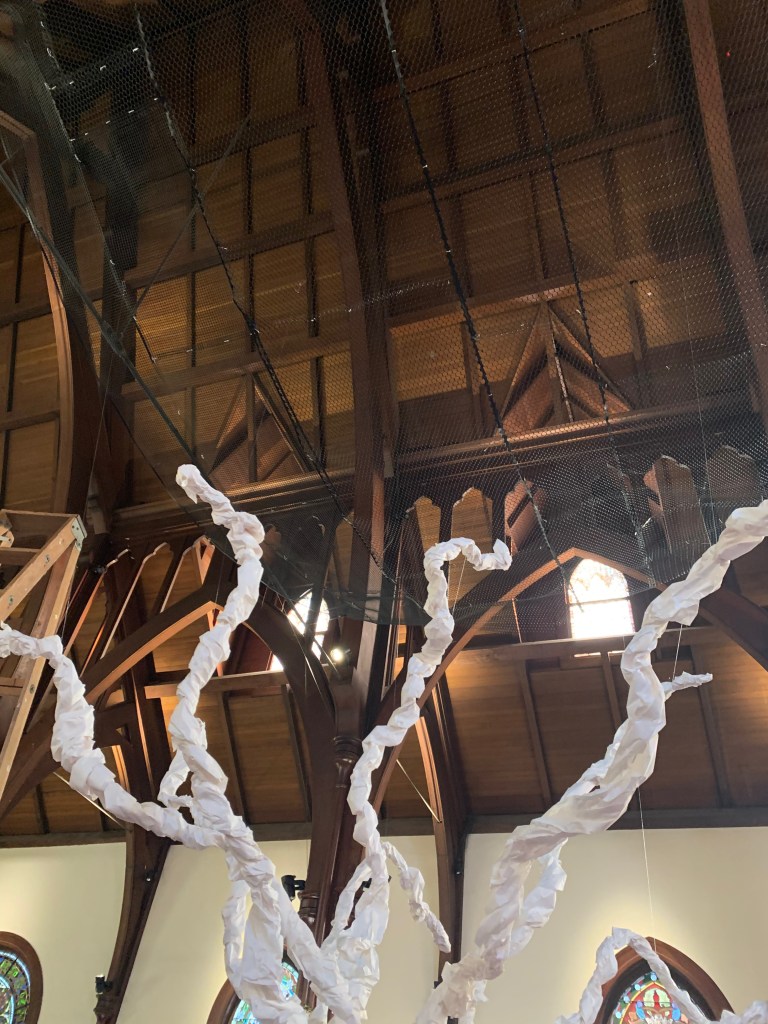


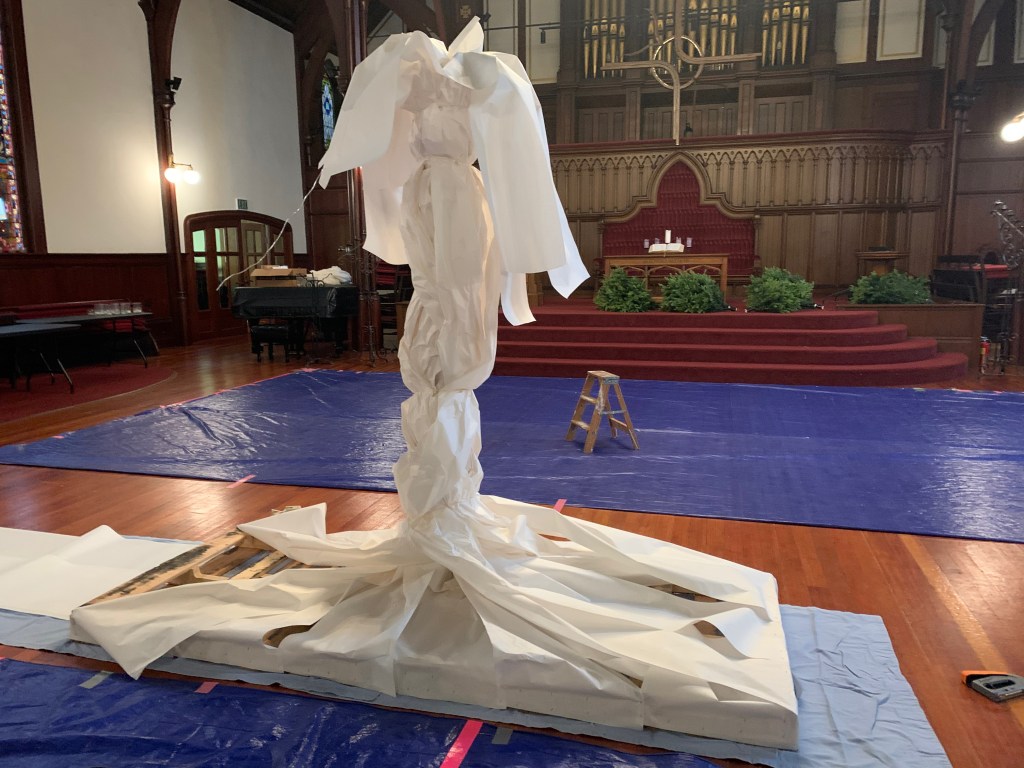
I suspended plastic chicken wire above the tree. It is hard to see in the pictures. I tied nylon string and paper clips to hang the branches in different forms and shapes. This also helped stabilize the tree. After all the branches are hung . . . voila . . . you have a tree.
From here, you can get creative with leaves, flowers, birds, butterflies, etc. I left the bottom branches bare so that participants could clip their leaves and flowers with written prayers on them. To make it easier to clip, I wrapped the bottom branches with white ribbon and made sure a couple branches hung low for kids to reach.

Leave a comment