
I was commissioned to do art work for Montreat College Conference. I haven’t done anything of this scale by myself, so it was a wonderful opportunity to challenge myself. Plus, I was able to do a technique inspired by the artist Simon Hantai’s Tabulas collection, that I saw in Paris at the Louis Vuitton Foundation. He uses a folding method to tie canvas and paint over it.

Since the theme of the conference is “Keep Going,” I used the words “On the Way.” As we are encouraged to Keep Going, it means we are actually already On the Way. Where is God guiding us? What detours do we take? What path do we choose?
The banners are made to look like those digital road signs you see on the road that sometimes tell you to slow down, merge, be careful, or watch out for bumps in the road. The letters are situated to give the illusion of the letters moving across the screen.
The banners are 18 ft. long and 5 ft. wide. The materials are canvas fabric, acrylic paint, string, and an iron. You can buy canvas by the yard on Amazon. Here are the steps to creating these banners:
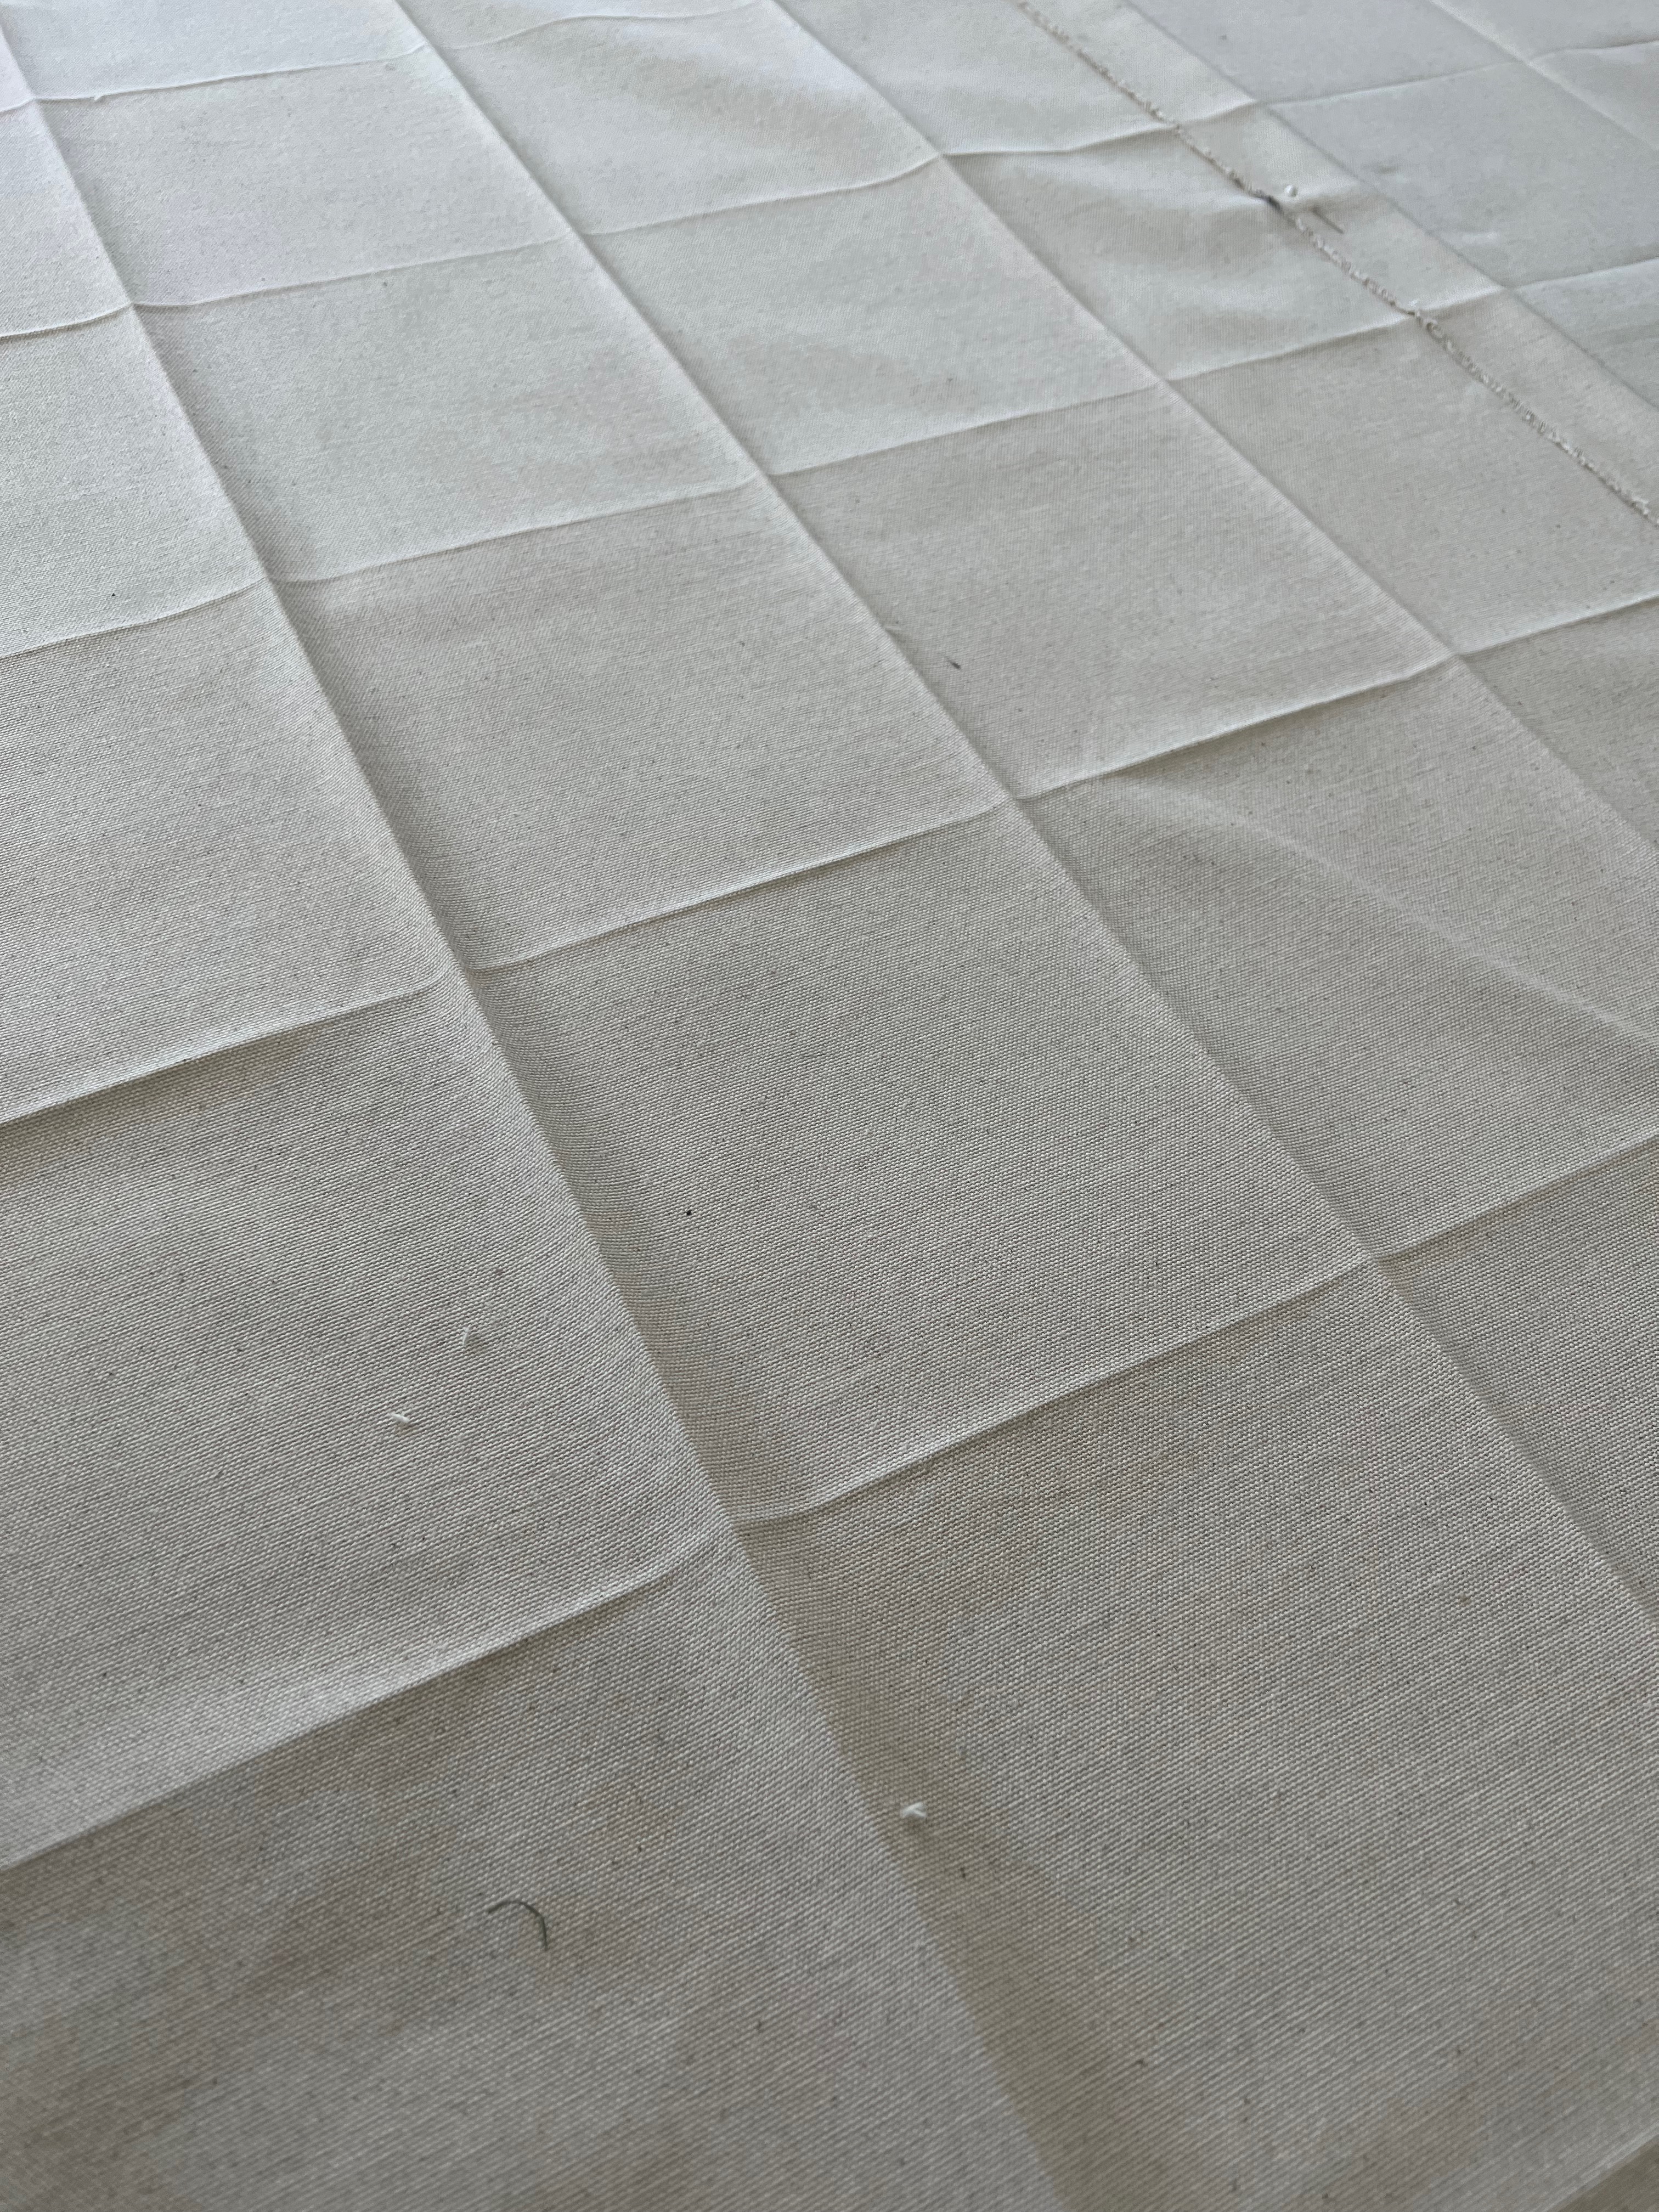
Step one: measuring the grid

I measured out 6″x6″squares. With the size of the fabric, I ended up with a grid of 10 squares across and 36 squares long. After trial and error, I found that the quickest way to do it is to start on one end and fold over 6″ of fabric, then iron to create a crisp seam. You will want to remember to have enough fabric to sew in a loop to be able to hang the banners.
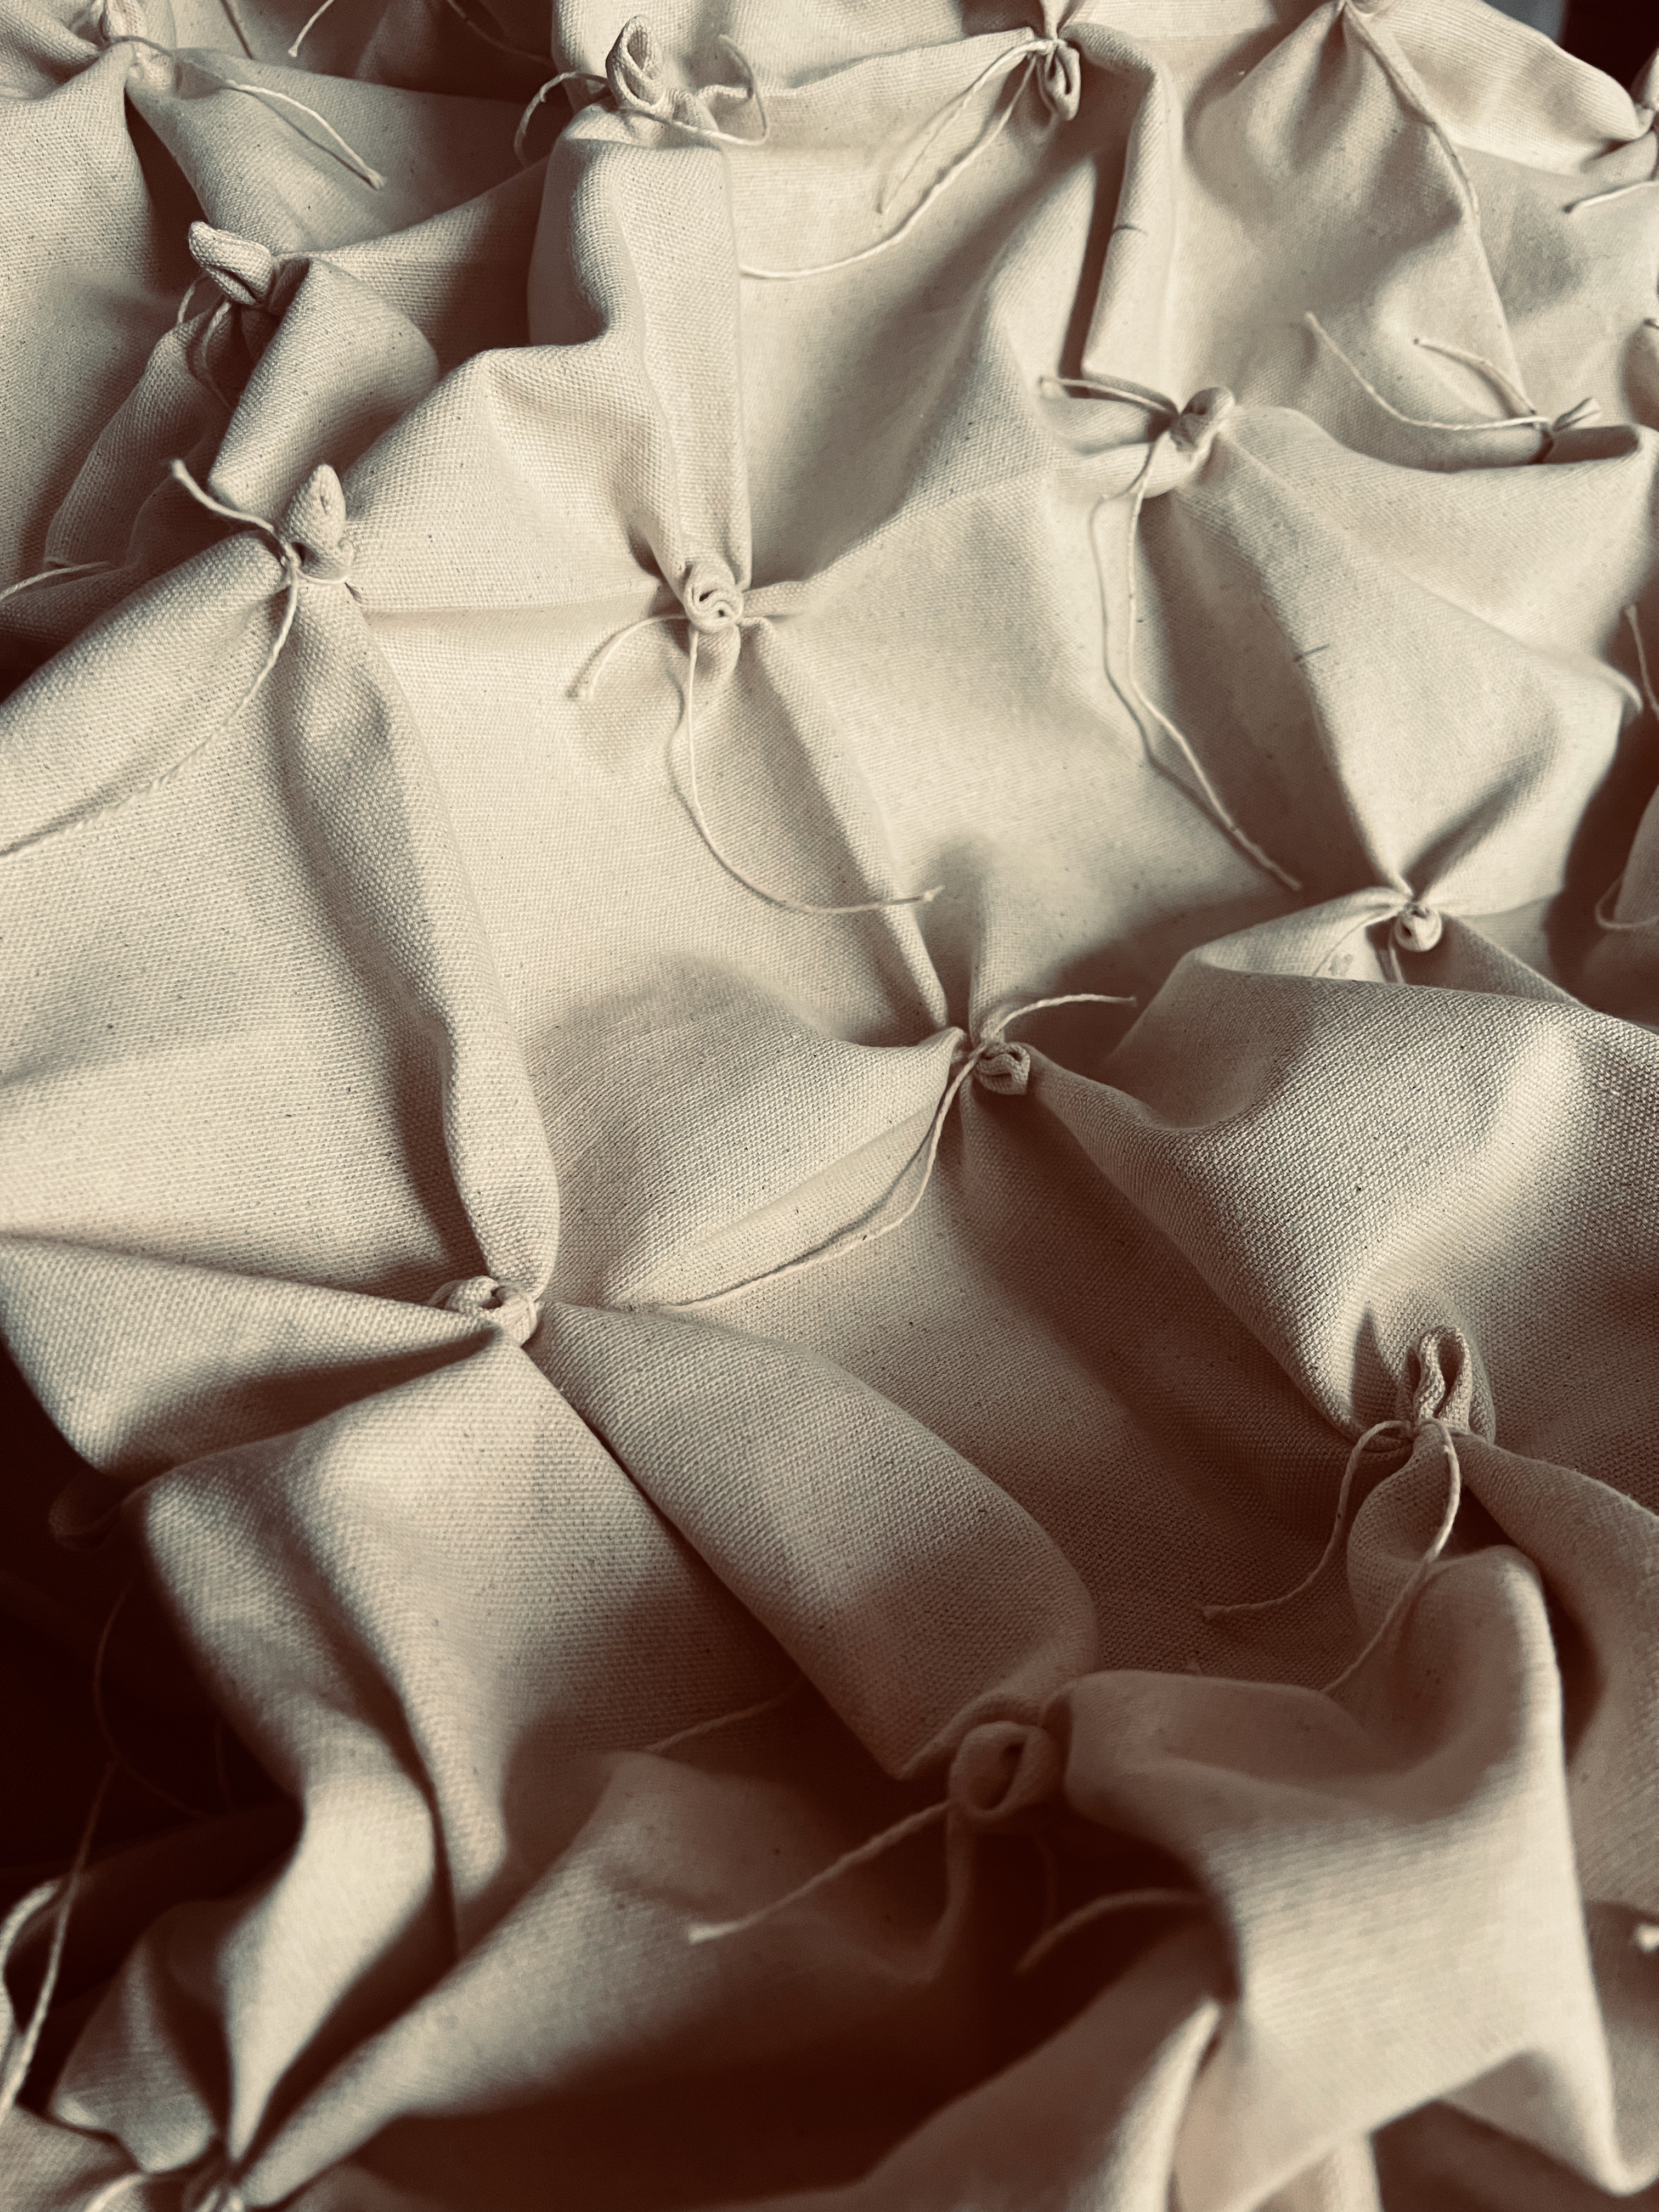
step two: tie the corners
At each corner of the squares, bunch up the corner and tie it together. They don’t have to be exact or the same size. The beauty of this project is the imperfections. Pace yourself as this step is very involved, so put on a good movie and tie away.
step three: ironing and more ironing
Flip the fabric on the other side (opposite side of the ties). Pinch the seams together in between the gathered corners and iron to create crisp seams. This will help create the squares when you paint the fabric. Again, don’t worry about being accurate. Each square doesn’t have to be the same size. Don’t worry if you iron wrinkles in the squares. It all adds to the artwork in the end.
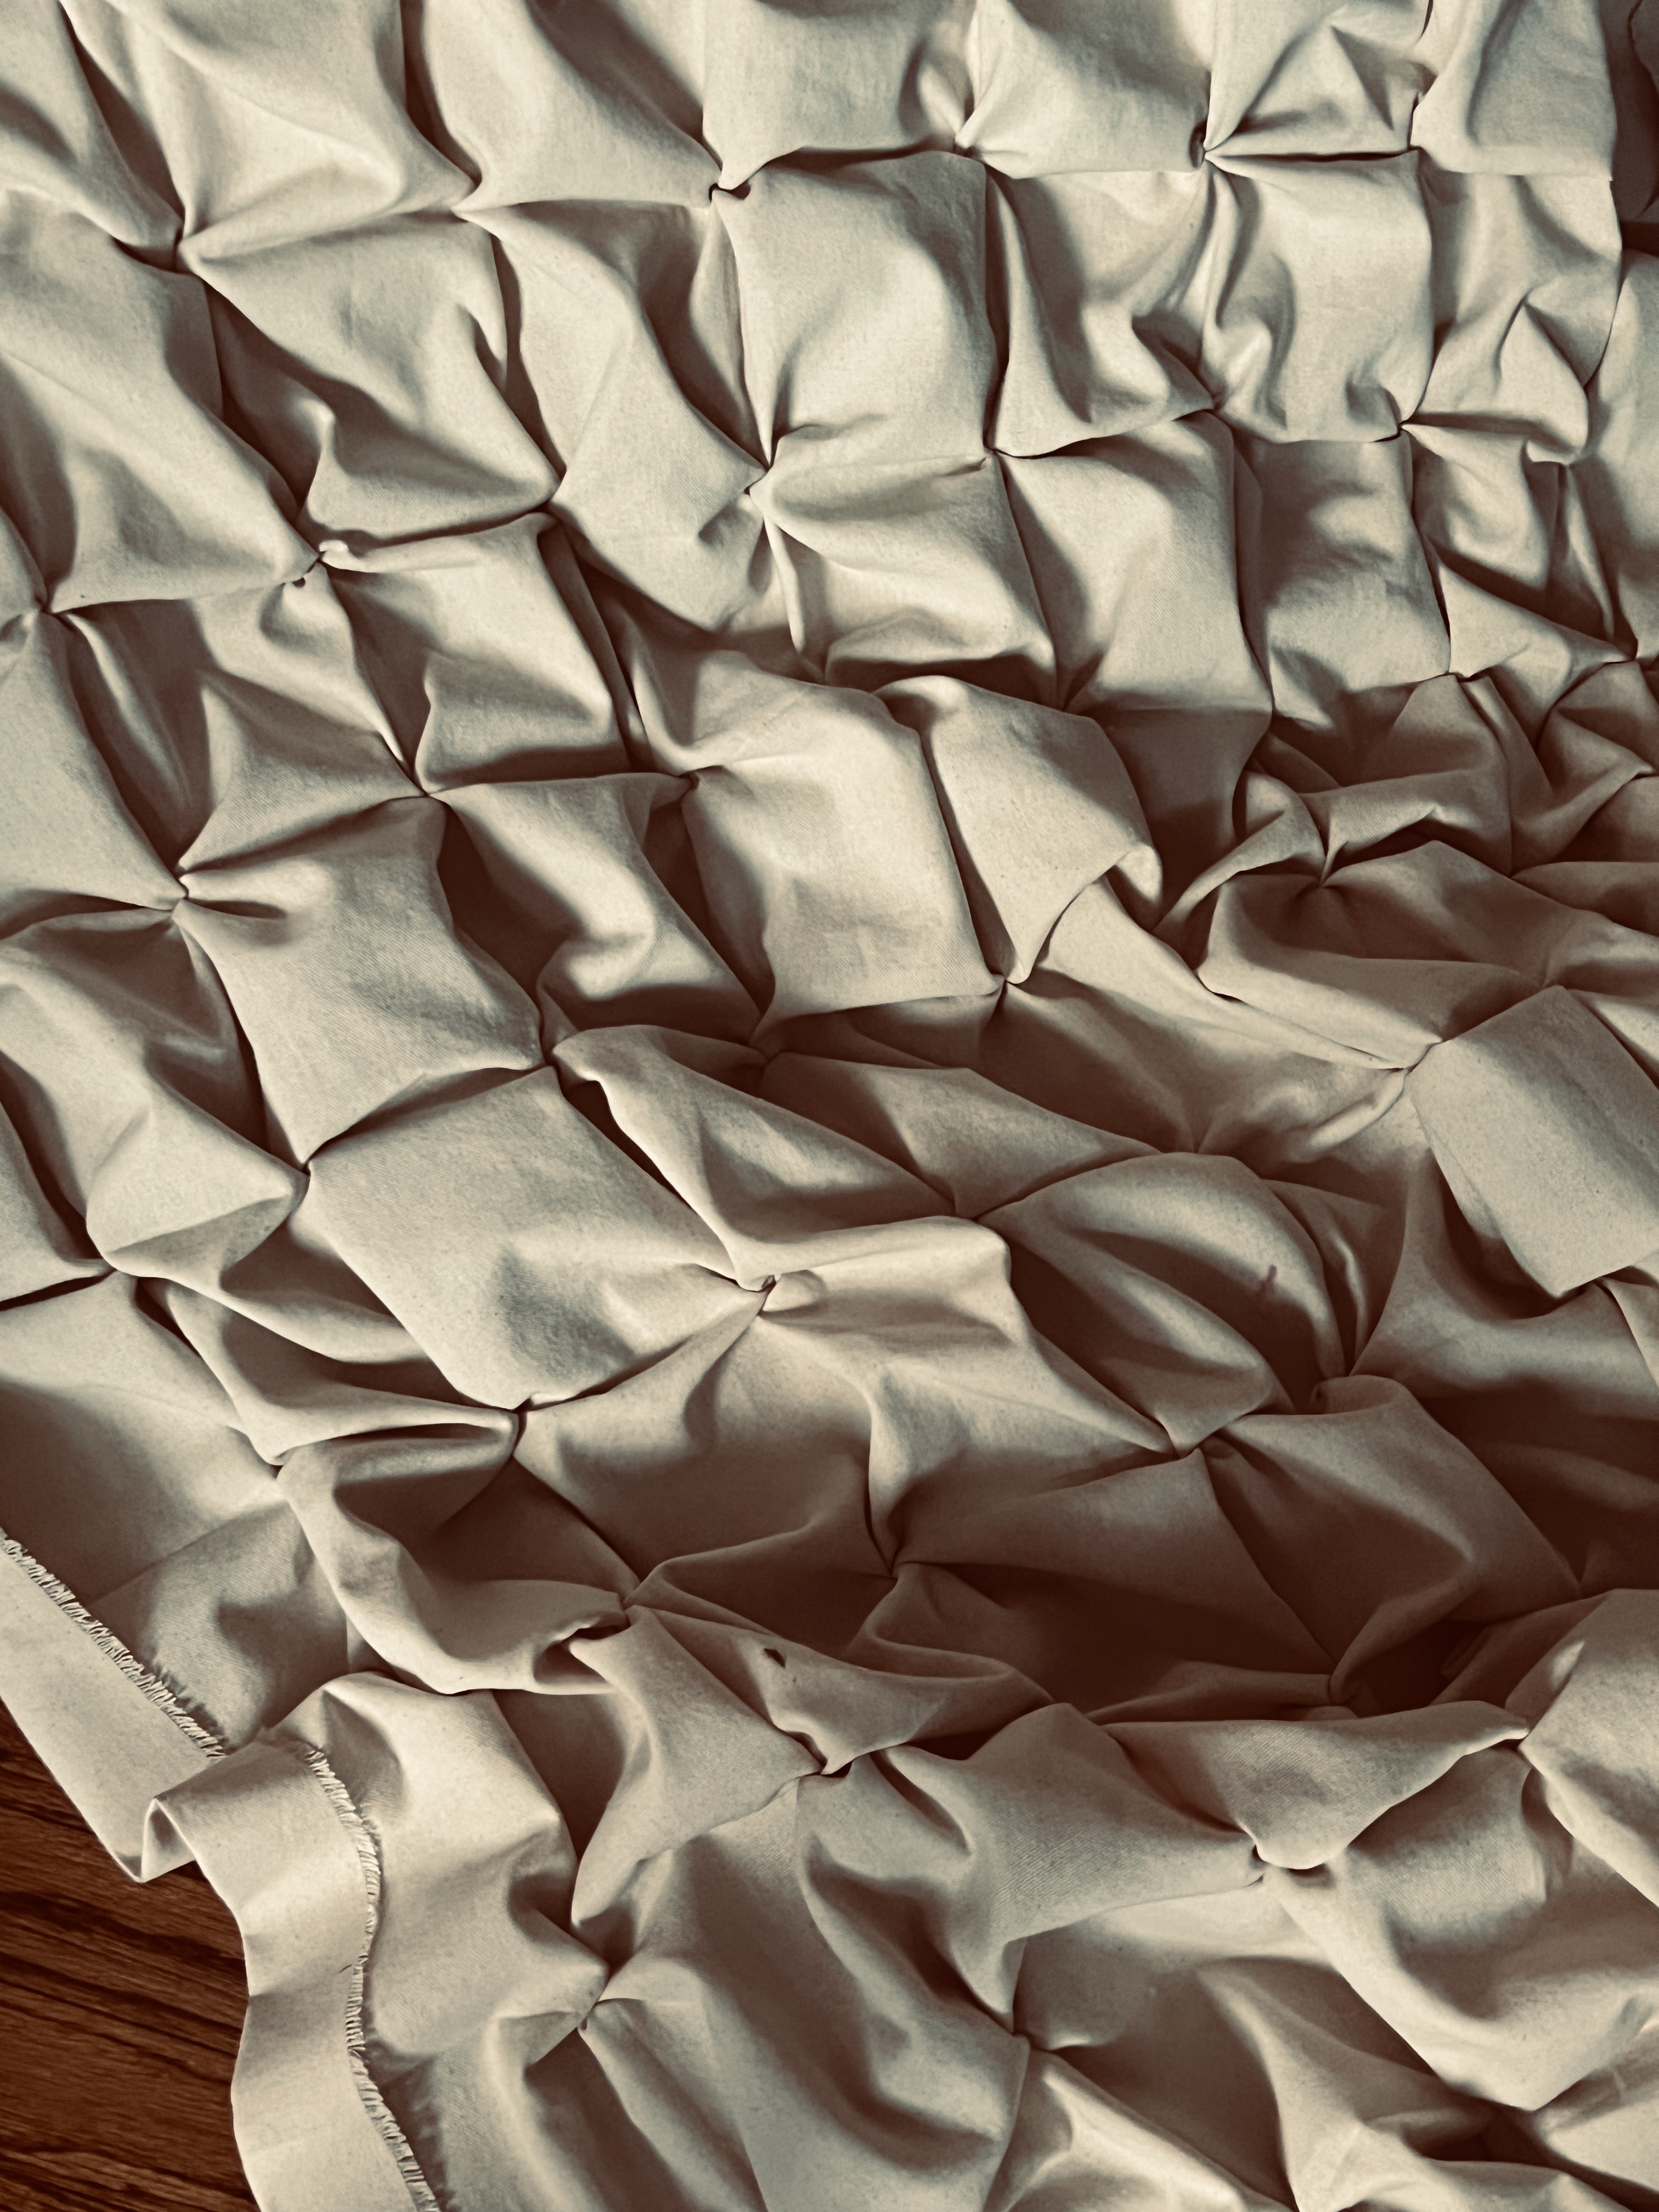
Step four: pin the seams
Flip the fabric over again and pin the ironed seams together. This will make it easier to paint and to protect the negative (unpainted) space in between the squares when you pull the fabric apart in the last step.

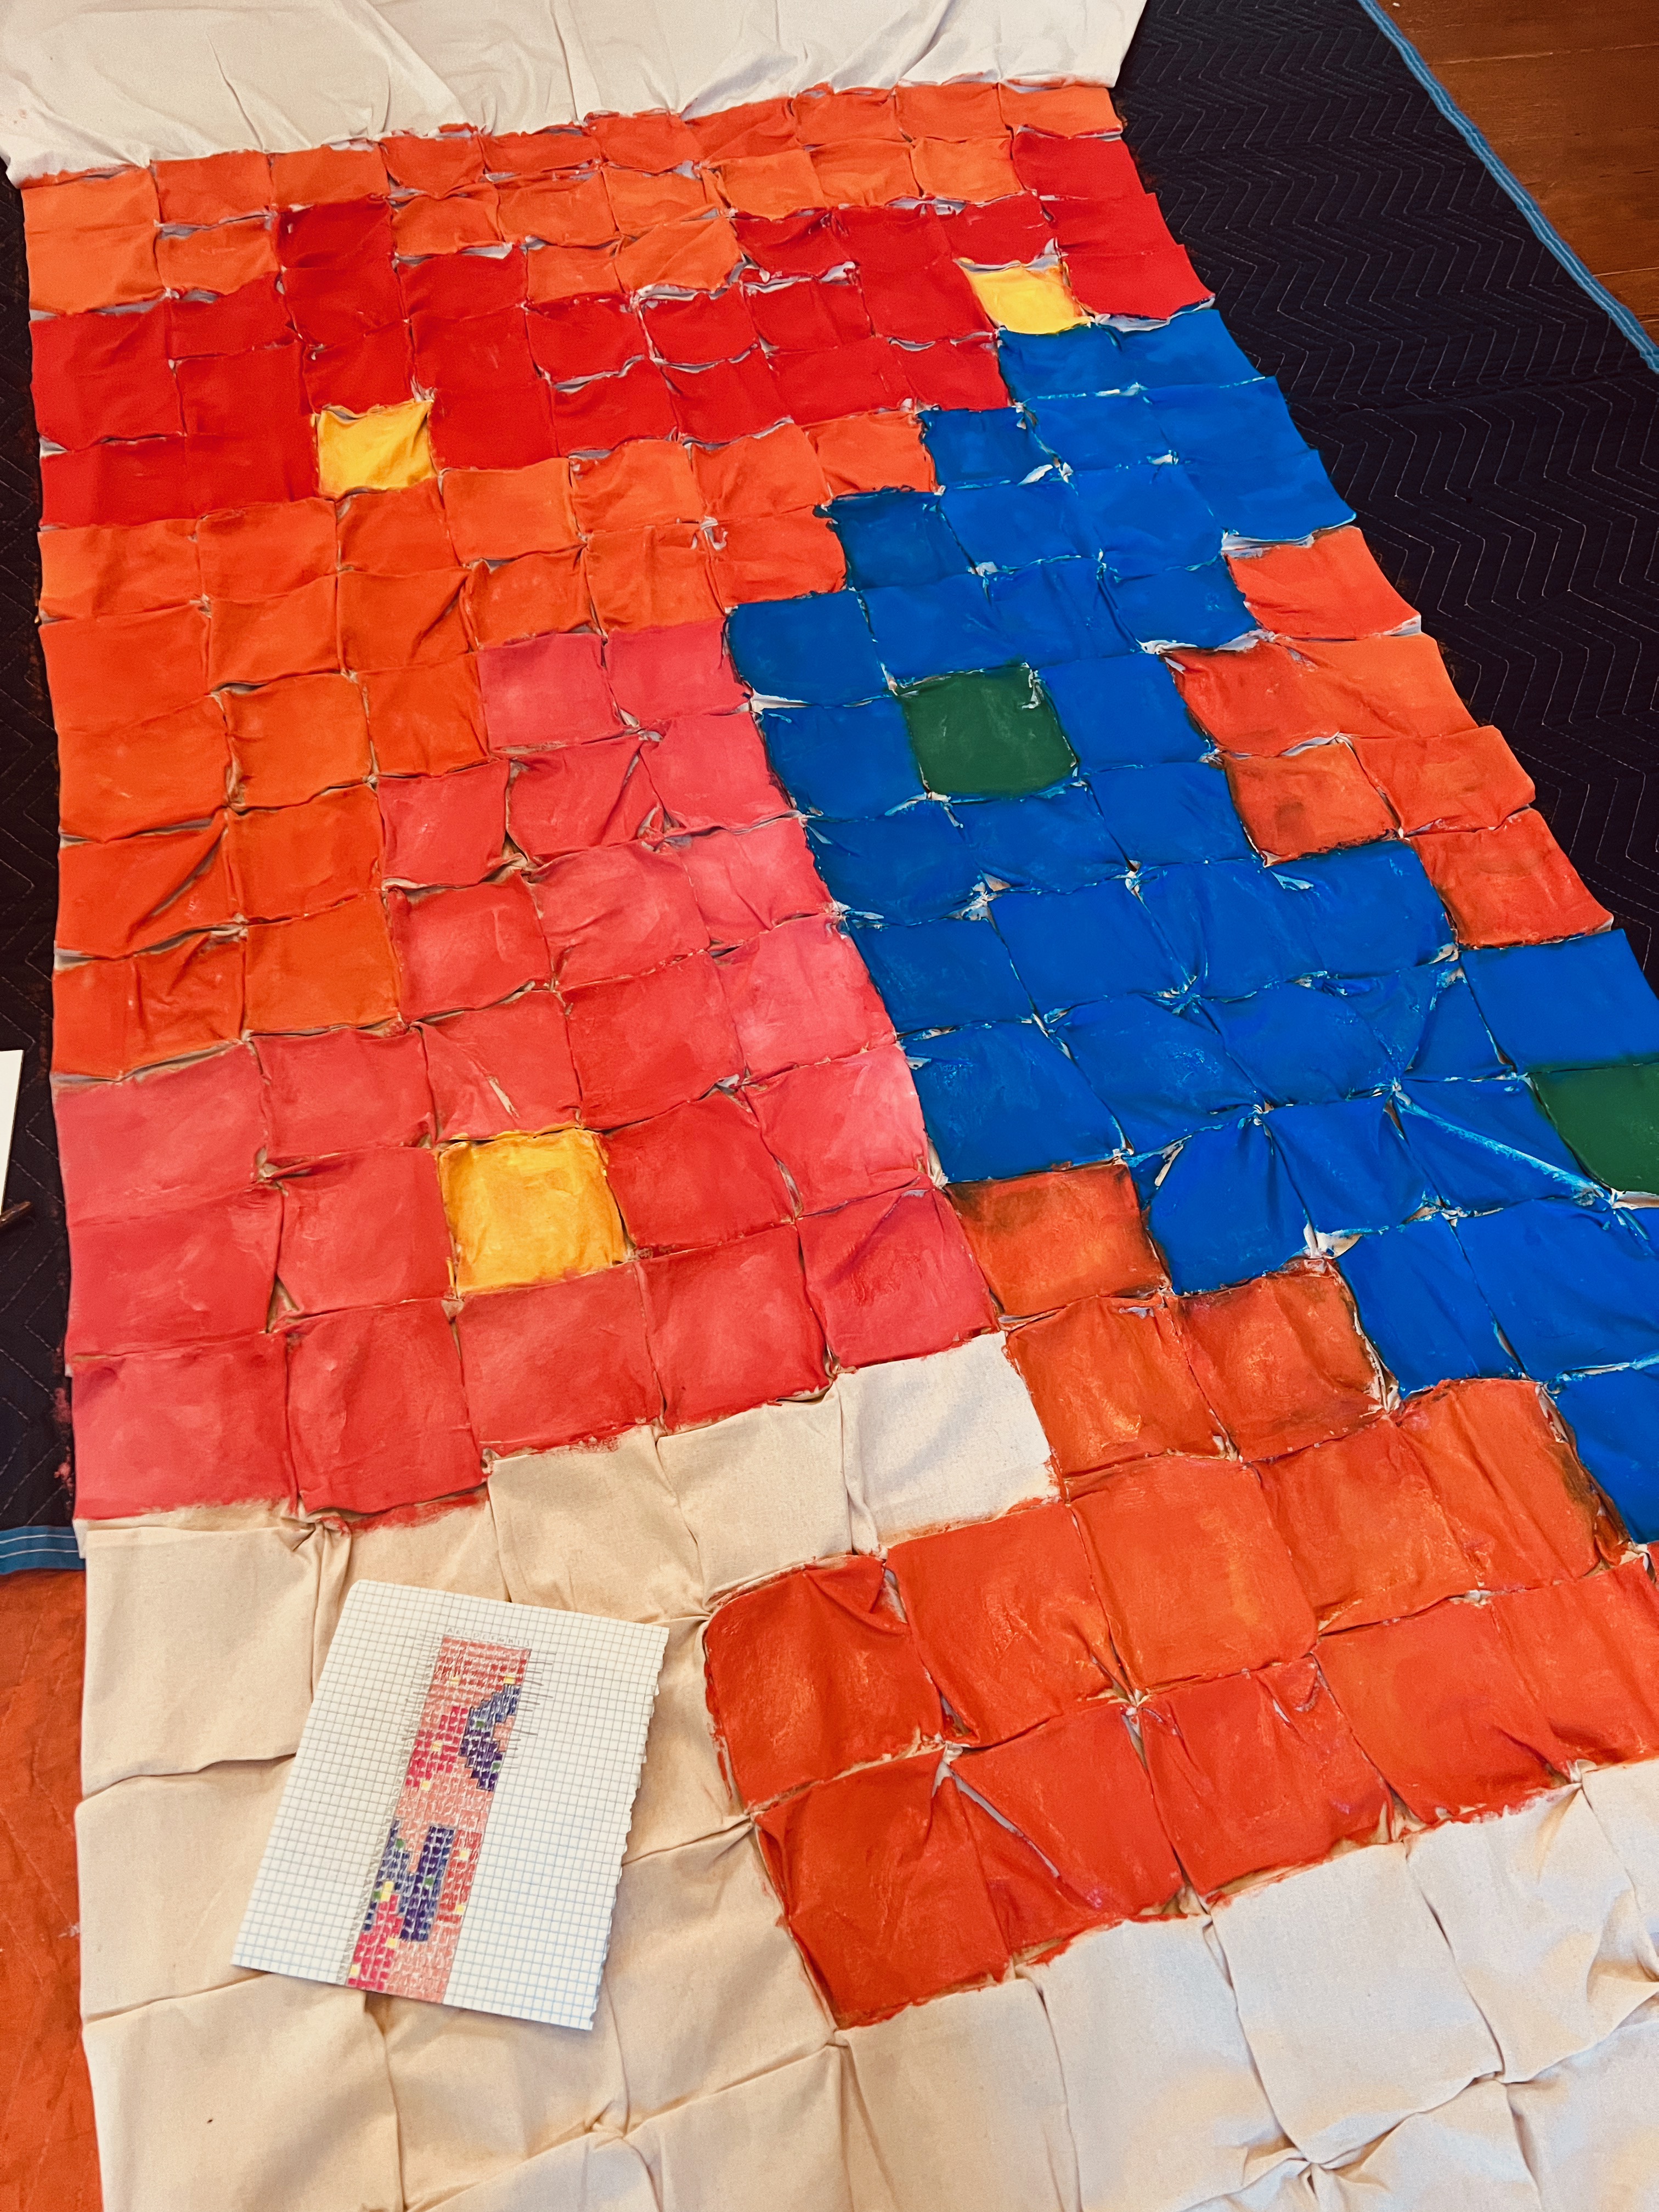
step five: paint
Now it’s time to paint. So after you have designed your pattern, paint each square accordingly. Don’t worry too much if paint gets on another square. It looks cool when each square has a little remnant of paint from the other squares. This is the fun part, so paint away.


Step six: untie and unpin
After the fabric dries, flip the fabric over and take out all the pins and ties. The easiest way to pull off the ties is to simply pull the fabric taut. The ties will easily fly off.
step seven: more ironing
Take the time to iron the fabric. Make sure you are ironing the non-painted side, not the painted side. This just ensures the banners will hang flat.

step eight: sew the seams
Sew a loop at the top of the banner so you can thread a pole through and hang the banner. Sew the sides and bottom so that the canvas doesn’t unravel.

step nine: enjoy
Hang the banners and enjoy! One of the things I love about this technique is how each square is an artwork in itself depending on the wrinkles and the paint, but when you step back it comes together.

